Submit an incident
Submit an incidentThe service healthdata.be (Sciensano) handels each report of an incident according to a Standard Operating Procedure (SOP). A public version of this SOP "HD Incident Management Process" is also available on this docs.healthdata.be portal.
To submit an incident related to the projects and applications that are in production, and facilitated or managed by the service healthdata.be of Sciensano, you first need to log in to the HD Service and Support portal.
After the log in step, you will arrive at the main page of the portal.
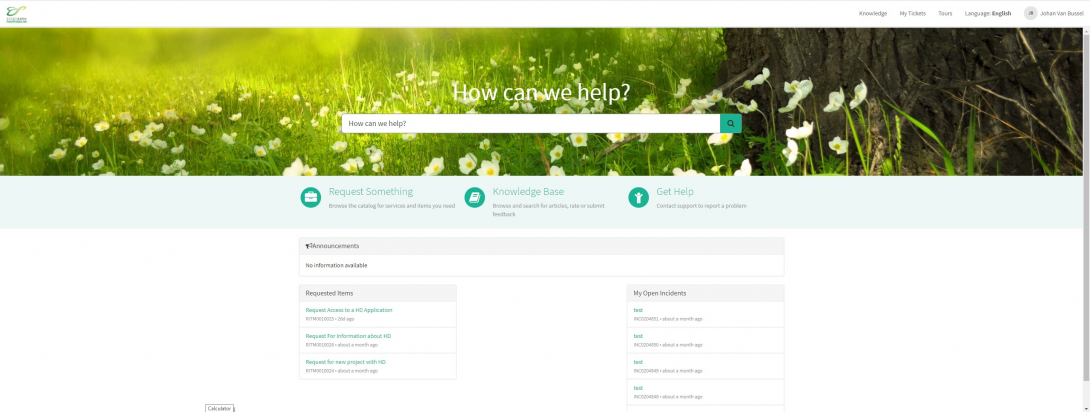
On the main page, you have to select "Get Help"
A new page with the title "Create Incident" will appear.
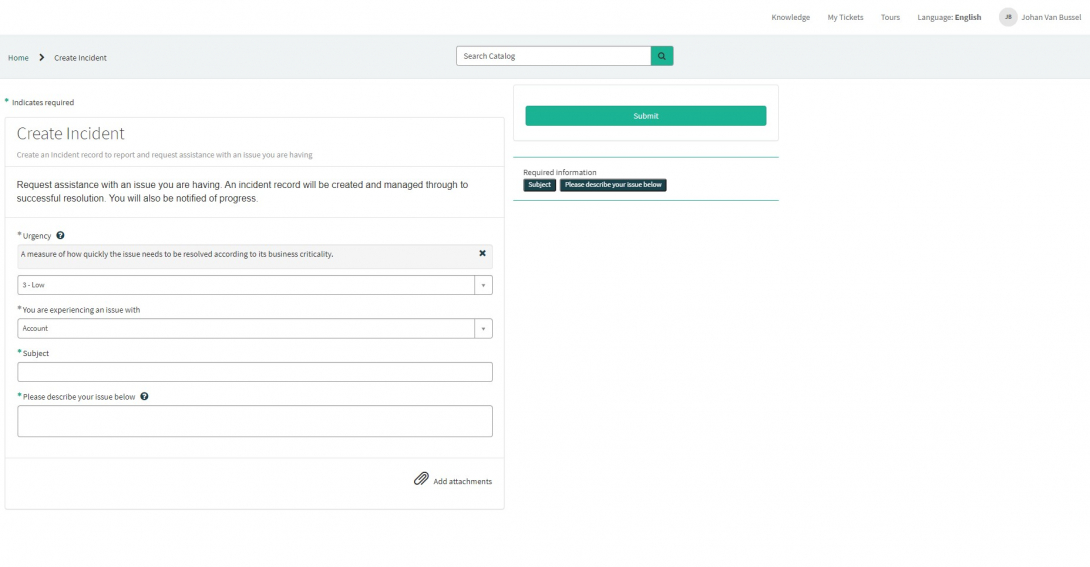
You can now document your incident or problem by providing following information:
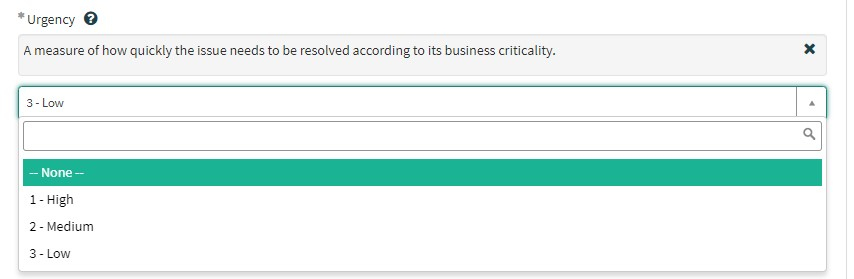
Please indicate the urgency your problem needs to be resolved according to its business criticality.
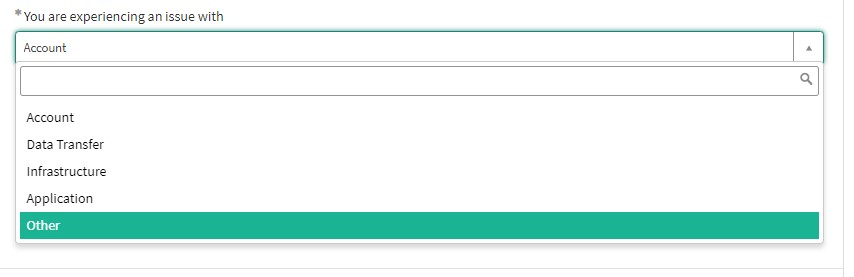
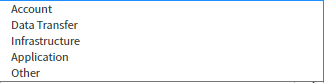
Please indicate the type of problem you are experiencing.
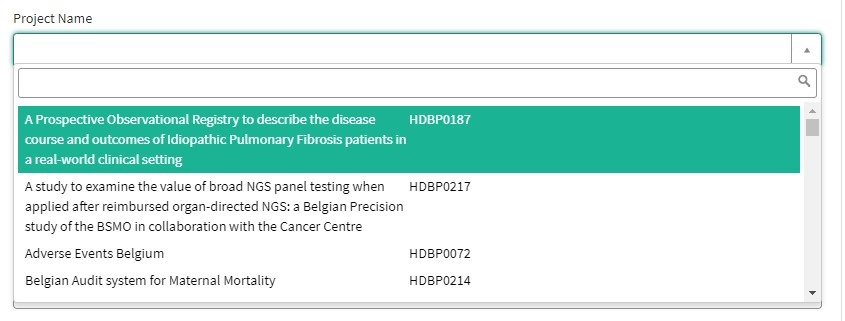
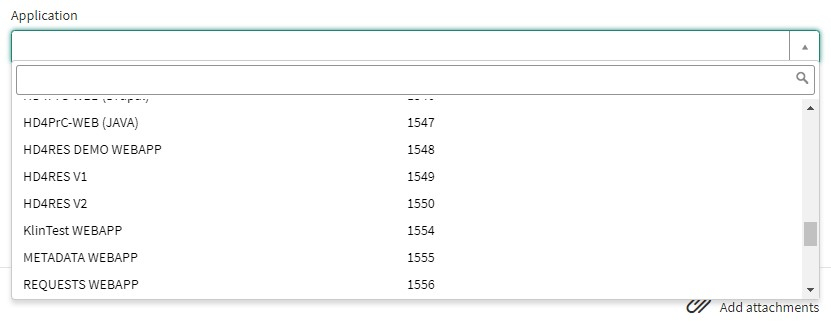
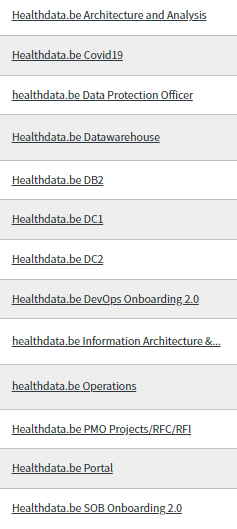
When the problem type "Application" is selected, two extra fields appear: "Project name" and "Application".

Please select the appropriate information.
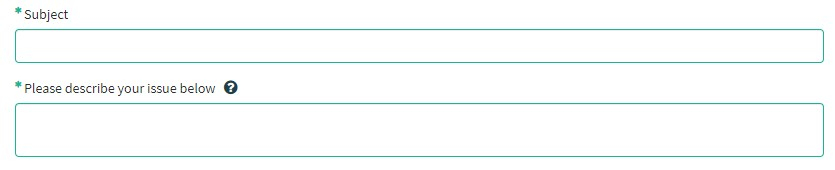
Please describe clearly and briefly (1 sentence) the subject of your problem.

Please describe in detail the problem. Following aspects are important for us to understand and to solve the problem:
- a description of the actions you want to perform but fail to accomplish (Ex: provide us field name, validation rule, button, etc.);
- a description (if possible) of the sequential steps you take to use the healthdata.be service or application you need support for;
- a brief description of the technical problem you are experiencing (e.g. error messages)

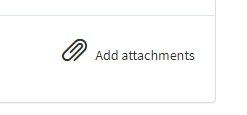
We highly recommend to add a screenshot describing the problem (IMPORTANT: do not provide us patient data!).
You can add the screenshot by pressing "Add attachments"
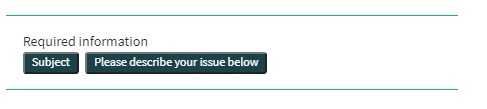
On the right side of the form, the required information elements of the Incident form are listed. When these fields are completed, these field names will disappear in the "required information" box.
Only if all required fields are completed , a form can be submitted., by pressing the green "Submit" button.
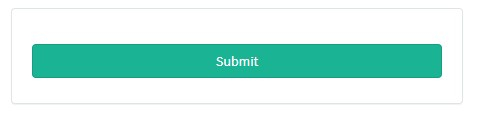
If not all required fields were completed, a warning message will appear on top of the form.

Also, the missing required fields will be highlighted in green.
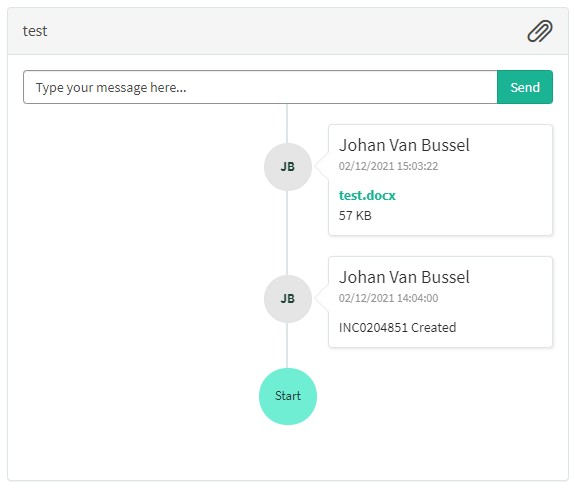
When the incident form was successfully submitted, an overview of your submission will appear in an new screen.
On the right of the screen, you will find the details , including the Incident number.
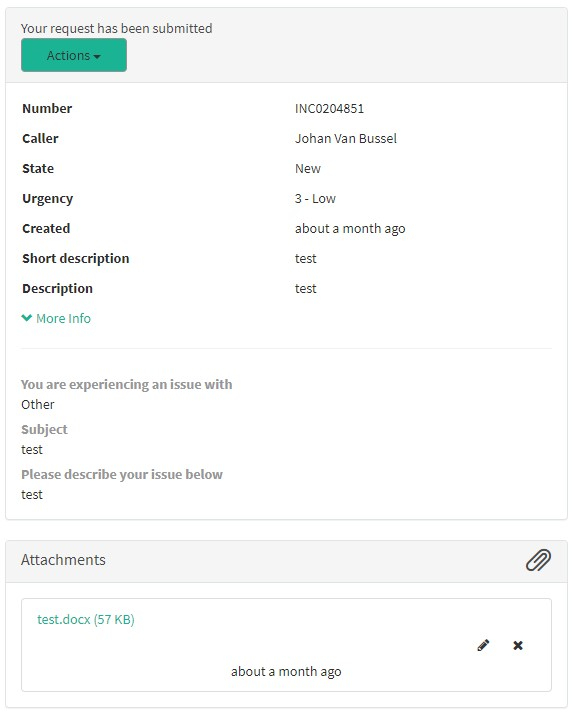
On the left of the screen, you will find a timeline of the handling your incident, starting with your creation.
Handling of incidents by HD
Handling of incidents by HD1. Introduction
The service healthdata.be (Sciensano) handels each report of an incident according to a Standard Operating Procedure (SOP). A public version of this SOP "HD Incident Management Process" is also available on this docs.healthdata.be portal. Below you can find the description of the procedure (work instructions).
2. Procedure
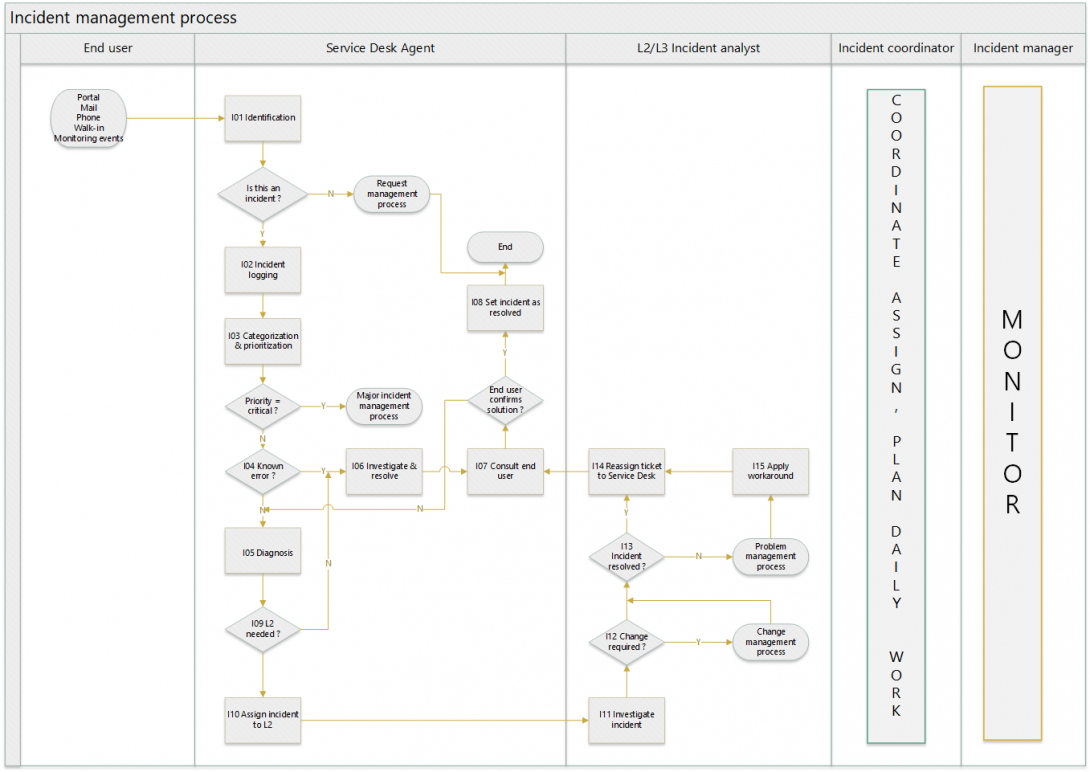
2.1. Diagram
2.2. Work instructions
2.2.1. STEP I01. Identification
Action:
The End-user can initiate an incident via :
- Portal : preferable way of reporting an incident.
- Email : a user sends a mail to Support.Healthdata@sciensano.be. The Service Desk has one day to pick this up and create a ticket on behalf of that user (= caller on the page)
- Phone : a user contacts the Service Desk by phone to report an incident. The Service Desk will immediately, while on the phone, create a ticket on behalf of that user (= caller on the page)
- Walk-in : a user can visit physically the Service Desk to report an incident. The Service Desk will immediately create a ticket on behalf of that user (= caller on the page)
- Monitoring event : an alert or event can initiate the automatic creation of an incident.
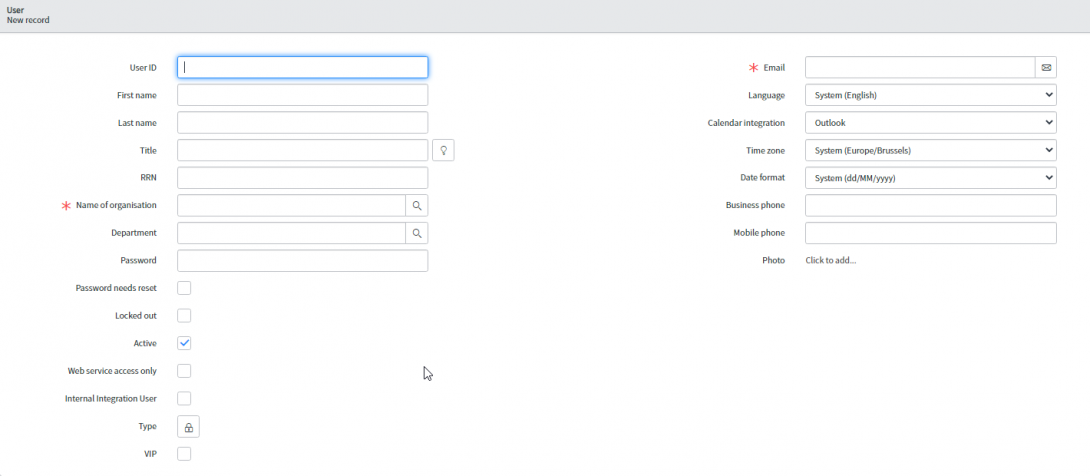
If the user does not exist, the Service Desk will create the user first and continue creating the incident.
Type ‘user’ in the search field, and chose ‘user’ in the list
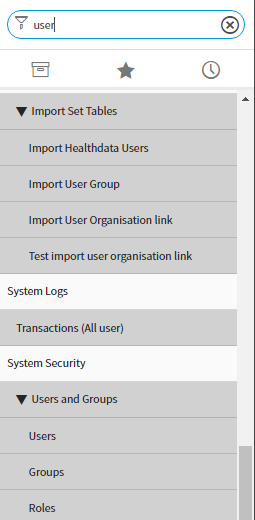
Fill in : User-id : e-mail address of the user.
2.2.2. STEP I02. Incident logging
Action: The Service Desk will perform a first analysis of the incident ticket. If the incident ticket :
- is not an incident, but a request : the incident ticket will be closed and the Service Desk will create an Service Request
- is an incident : the ticket will be enriched with the first analysis
Fields to be filled if a user calls, or sends an e-mail, or walks in :
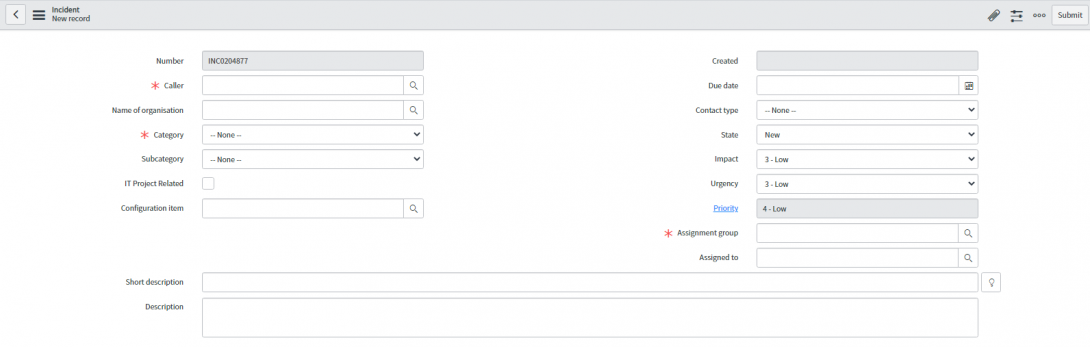
The fields with * are mandatory fields :
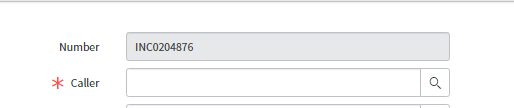
- Caller : the name of the user that wants to log the incident (see step1 Identification)
- Category : choose the right category on which the incident has been detected :
- Assignment group : at first, the ticket is always assigned to the Service Desk assignment group ‘Healthdata.be Service Desk’
Other fields :
- The field ‘Assigned to’ is filled in by the incident coordinator of the assignment group. He decides who is best fit to solve the incident and is available.
- The short description describes in a nutshell what the incident is about.
- The description is very important in the analysis of the incident and has to be as complete as possible.
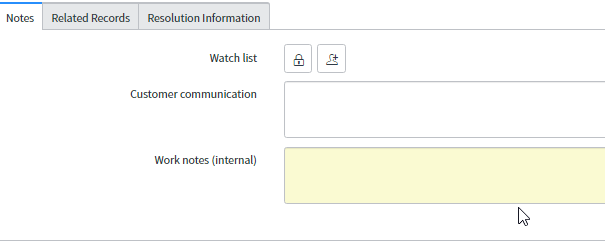
- Once all fields are filled, and the incident is submitted, it is not allowed to modify any field, but the assignment group. All work information is to be noted in the ‘Work notes’. The field ‘Customer communication’ is also visible for the end-users in the portal.

- The other assignment groups (Level 2 –groups) are :
2.2.3. STEP I03. Categorization
Action: The Service Desk will verify or modify the category on which the incident has been opened :
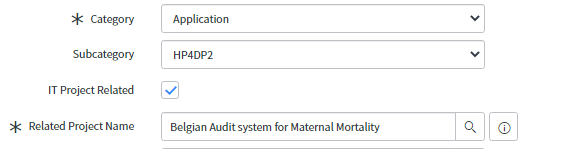
Pick the category and subcategory from a dropdown list. If the description of the incident includes a project (DCD), tick the checkbox ‘IT Project Related’ and choose the project from the list.
2.2.4. STEP I03(1). Prioritization
Action: The Service Desk will verify or modify the priority on which the incident has been opened :
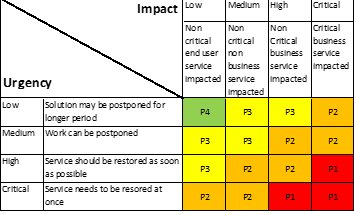
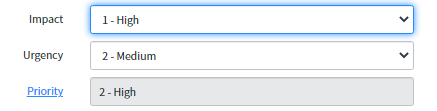
If the user (caller) is not satisfied with the priority, he can ask the Service Desk to change it. However, only an incident manager or COORD can decide to raise an incident to a P1-level.
2.2.5. STEP I04. Known error
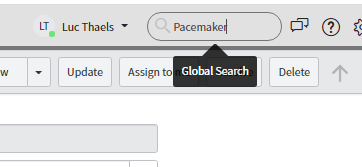
Action: The Service Desk will try to detect if a solution is already known in the knowledge base or in a problem record. If found, the Service Desk will apply this solution.
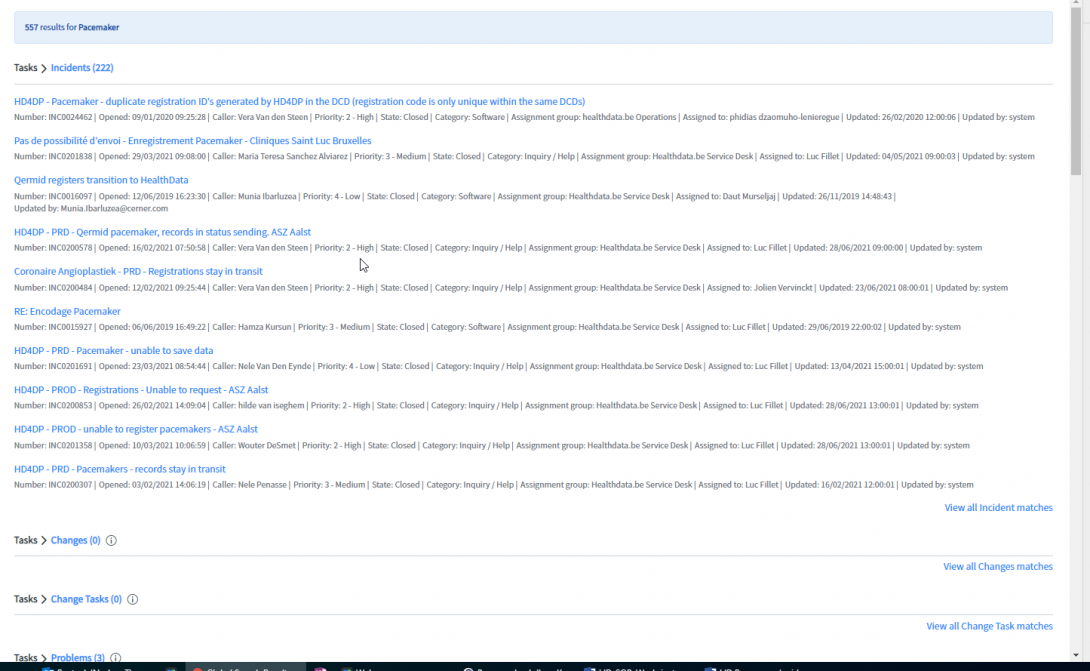
- A keyword can be entered in the search bar. (for example Pacemaker) The result will be shown, for all processes.
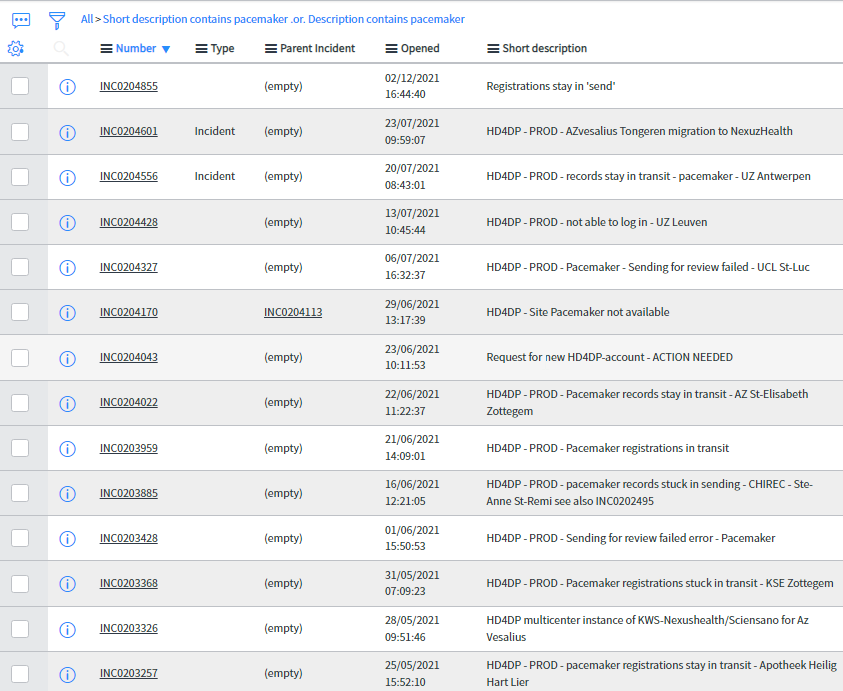
- A filter can be made in the incident screen.
Click on the funnel

The filter will open

You can change, add, remove and define filters with the AND and OR-function

Clicking on ‘run’ will execute the filter and show the results on incident-level :
2.2.6. STEP I05. Diagnosis
Action: Incident diagnosis will be carried out after the first analysis (I02)
The Service Desk will note the diagnosis in the ‘Work notes’, or if needed to inform or consult the user, in the ‘Customer Communication’-field.
In case that the user needs to be consulted, the Service Desk will change the state to ‘On hold’ and ‘Awaiting caller’

2.2.7. STEP I06. Investigate &Resolve
Action: Once the Service Desk has all the needed info, investigation can be done and a solution applied. The Service Desk will :
- Fill in the resolution notes in user language.
- Click on ‘Update’ (NOT on ‘Resolve’ yet’)
- Change the state to ‘On hold’ and ‘Awaiting Caller’

2.2.8. STEP I07. Consult End-user
Action: The Service Desk will call the user to ask for validation of the solution applied. Additionally, the user will receive a notification in the portal and via mail that he needs to confirm the solution applied within 5 days. (see SOP ‘Process ‘Manage Awaiting tickets’)
2.2.9. STEP I08. Set incident as resolved
Action: When the user confirms the solution applied, the Service Desk will :
- Add the confirmation in the Work notes
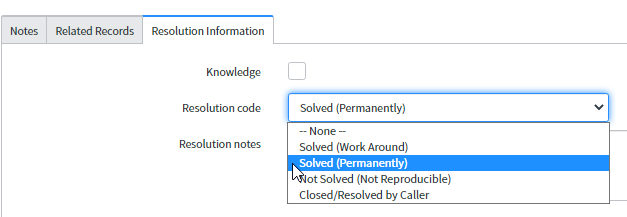
- Choose the right ‘resolution code’ :
- In most cases ‘Solved (permanently)
- In case a work around is applied : ‘Solved (Work Around)
- Click on ‘Resolve’

Once the Service Desk has changed the status of the incident ticket to ‘resolved’, the end-user has 5 working days left to re-open the ticket. After 5 working days, the ticket will be automatically set to the status ‘closed’. The end-user not the Service Desk will not be able to re-open the ticket, and has to create a new incident ticket.
2.2.10. STEP I09. L2 needed ?
Action: If the Service Desk is able to solve the incident, the ticket will remain in the group and continue with I06. If the Service Desk cannot resolve the incident, the ticket will be assigned to L2-group.
- See step I02 for a list of assignment groups.
2.2.11. STEP I10. Assign incident to L2
Action: Once the ticket is assigned to a L2-group, the incident coordinator of that particular group has to manage this ticket, under control of the incident manager.
2.2.12. STEP I11. Investigate incident
Action: With the investigation and diagnosis of the Service Desk, the L2-group will further investigate the incident, with possible help of an L3-group (external party)
The ticket number of the L3-group (external party) has to be entered in the field ‘Your Ticket Number’

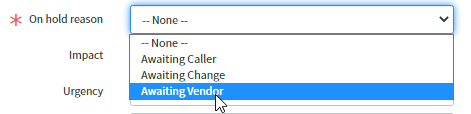
If the ticket is being handled by a 3th party, the status of the ticket has to be put ‘On hold’ and ‘awaiting Vendor’

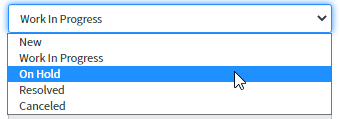
Once the 3th party has handled the ticket, the status will be changed into ‘Work in Progress’ and work will continue.
2.2.13. STEP I12 Change required ?
Action : After further investigation, the L2-group has to decide if a change is needed (functional or infra related) to solve the incident.
If not, the next step I13 is applicable, and the status remains ‘Work in Progress’.
If yes, the change management process starts, and status is ‘On hold’, ‘Awaiting change’.


The change number will be noted in the tab ‘Related Records’, field ‘Change request’ and the ‘Update’ button applied.

When the changed has been executed, the status of the ticket will be changed in ‘Work in Progress’ and work will continue.
2.2.14. STEP I13 Incident Resolved ?
Action : If the incident is solved, the work notes of the incident ticket will be updated with the proposed solution.
If no change is required, but the incident is still not solved :
- problem management process starts
- the status is set to ‘On hold’, ‘Awaiting problem’
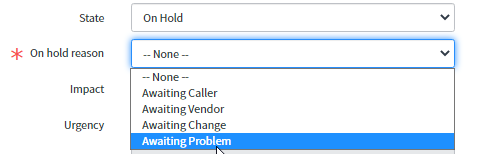
The problem number will be noted in the tab ‘Related Records’, field ‘Problem’ and the ‘Update’ button applied.

A workaround has to be found to solve the incident temporarily.
2.2.15. STEP I14 Reassign ticket to Service Desk
Action : When the solution (permanent or via workaround (STEP I15) is applied, the incident ticket will be reassigned to the Service Desk, who will continue with STEP I07..
2.2.16. STEP I15 Apply work around
Action : If the incident cannot be solved permanently :
- A work around has to be applied to solve the incident temporarily
- The work around has to be entered in the Work Notes of the incident ticket and in the ‘Analysis’-tab in the problem ticket (see Problem Management)
- The ticket is reassigned to the Service Desk (STEP I07