Create a PACEMAKER registration
Create a PACEMAKER registration Bart.Servaes Fri, 03/17/2023 - 13:30Create a PACEMAKER "Primo-implantation" registration
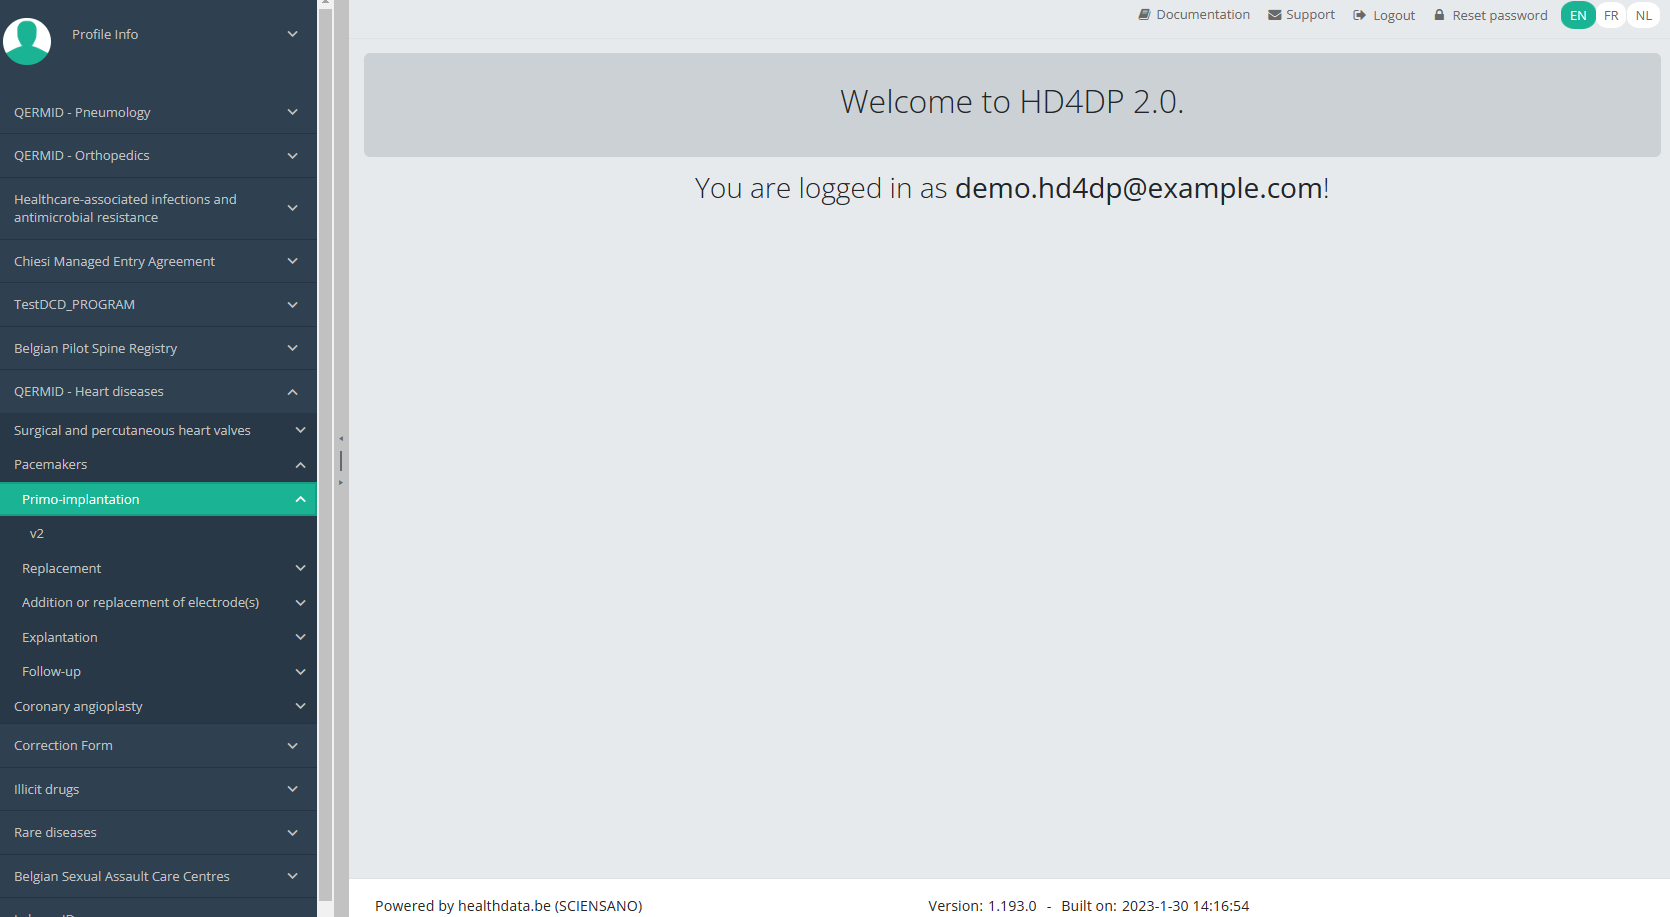
Create a PACEMAKER "Primo-implantation" registrationTo create a Primo-implantation registration for the study project Pacemakers, select "Primo-implantation" in the dark blue left menu.
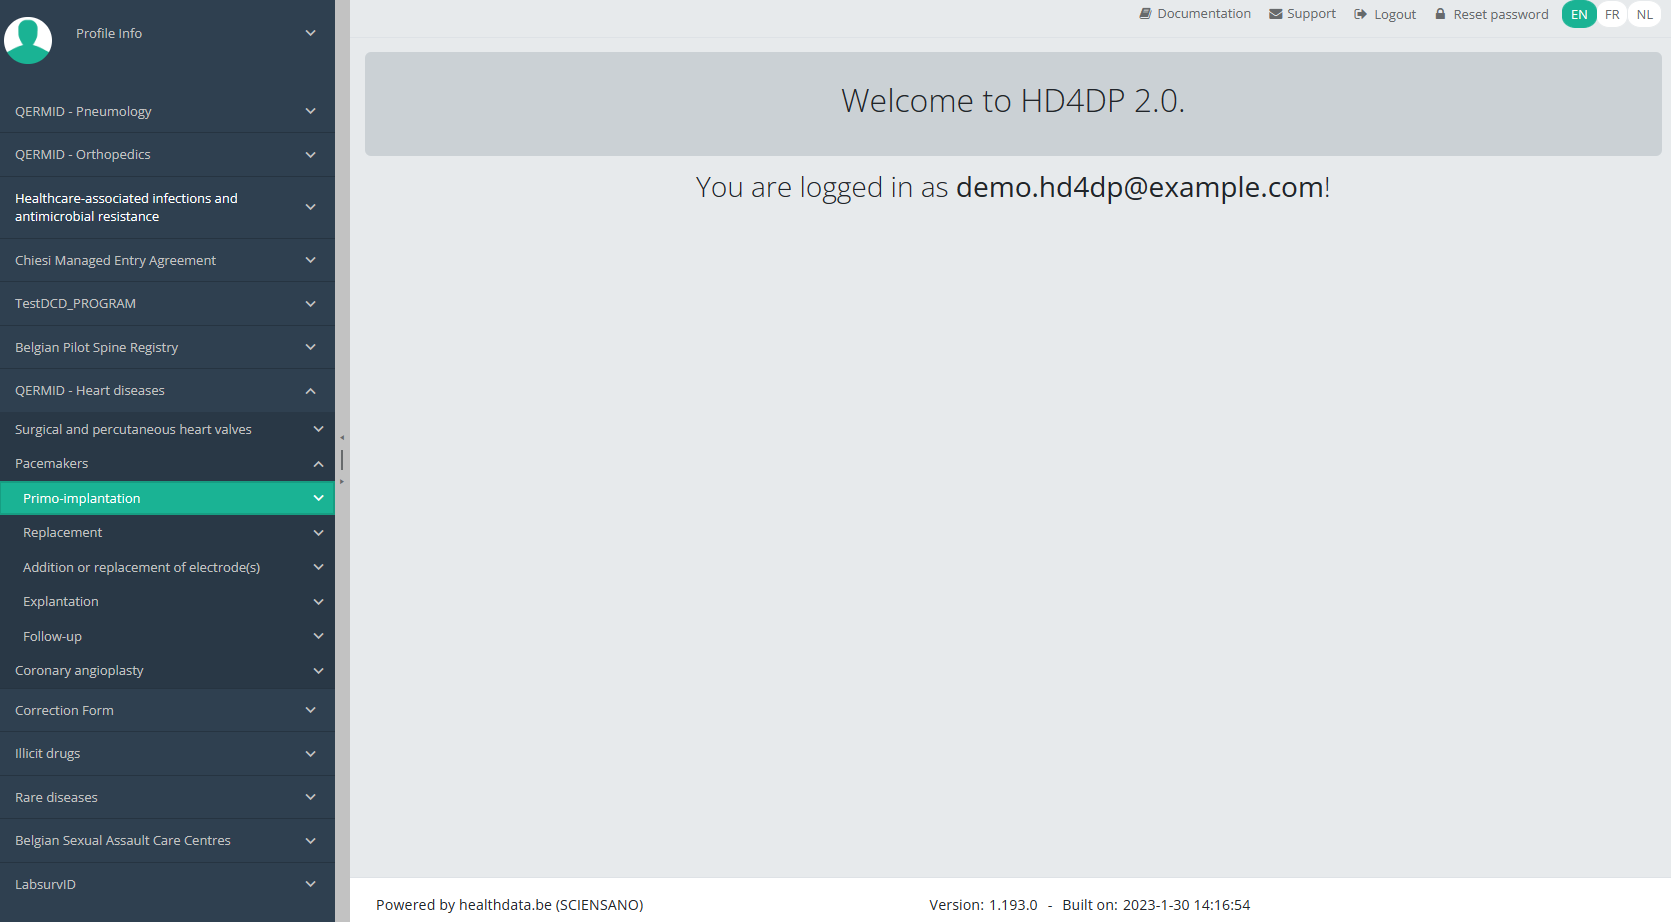
You will see the number of versions of this study section. In this case, there are two versions: v2.
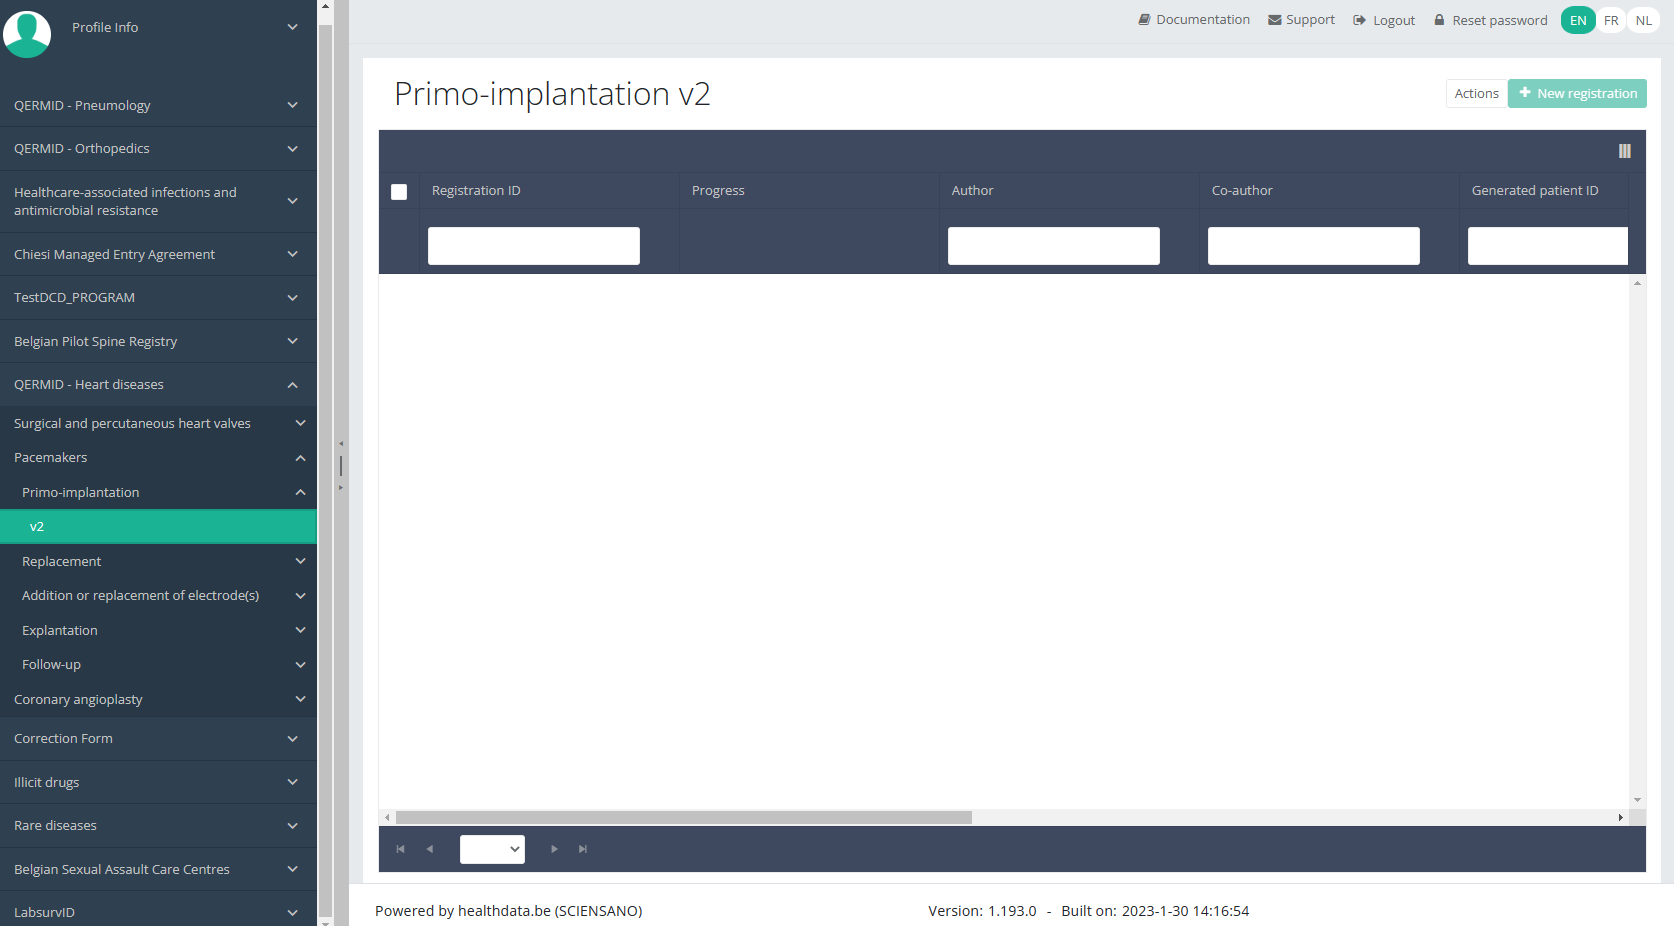
When you select the highest version of this study section for the first time, you will see an empty overview table in the main part of your screen. The table contains, among others, the following items: Registration ID, Progress, Author, Co-author, Unique ID, Business key, Registration code, National registry ID of the patient...
NOTE:
The study section is not always available in the selected language. In that case the text frame pictured below covers the language selection buttons. It automatically disappears after a few seconds.
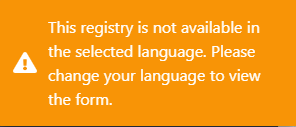
You will have to select the desired language through the respective language buttons:
NL for Dutch, FR for French or EN for English.
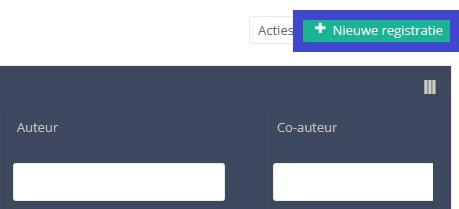
In the top right corner of the screen you can find a green button "+ New registration". Select this button.
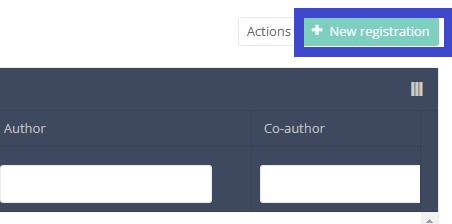
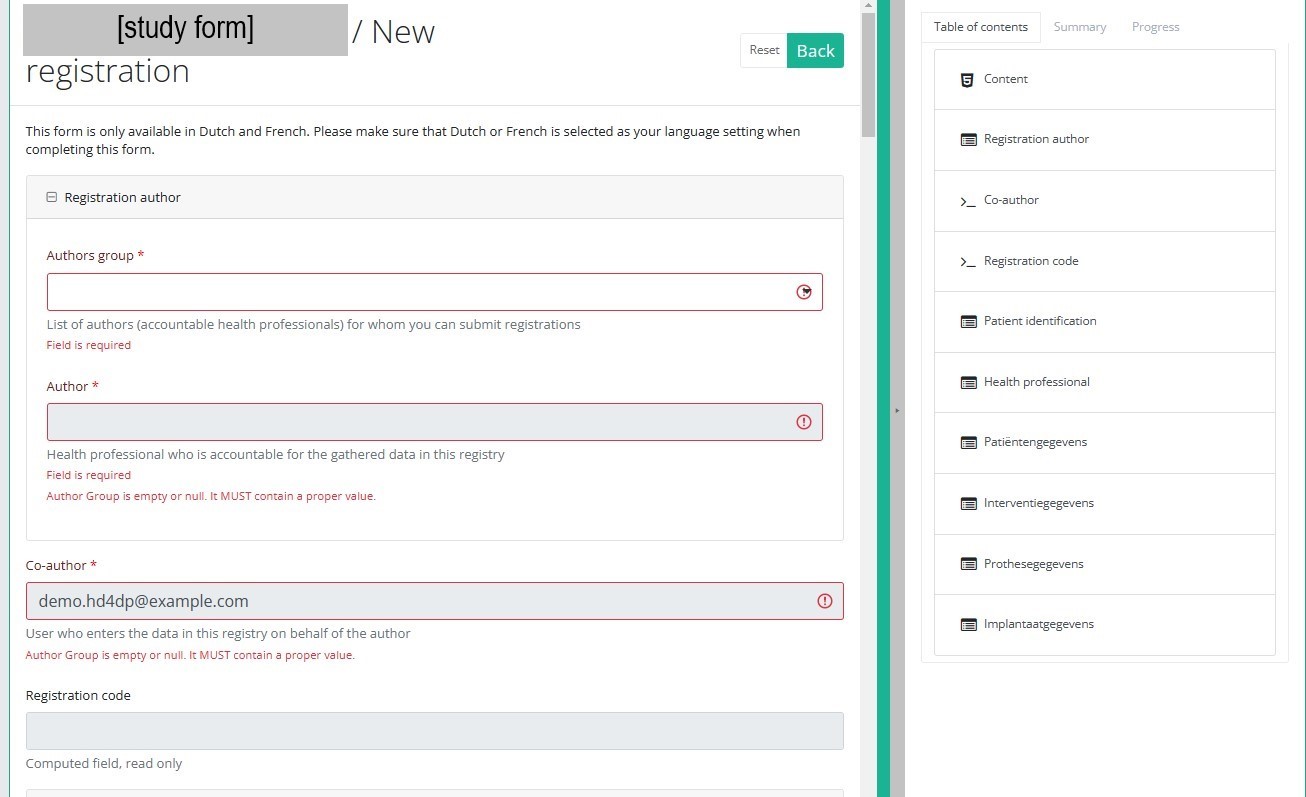
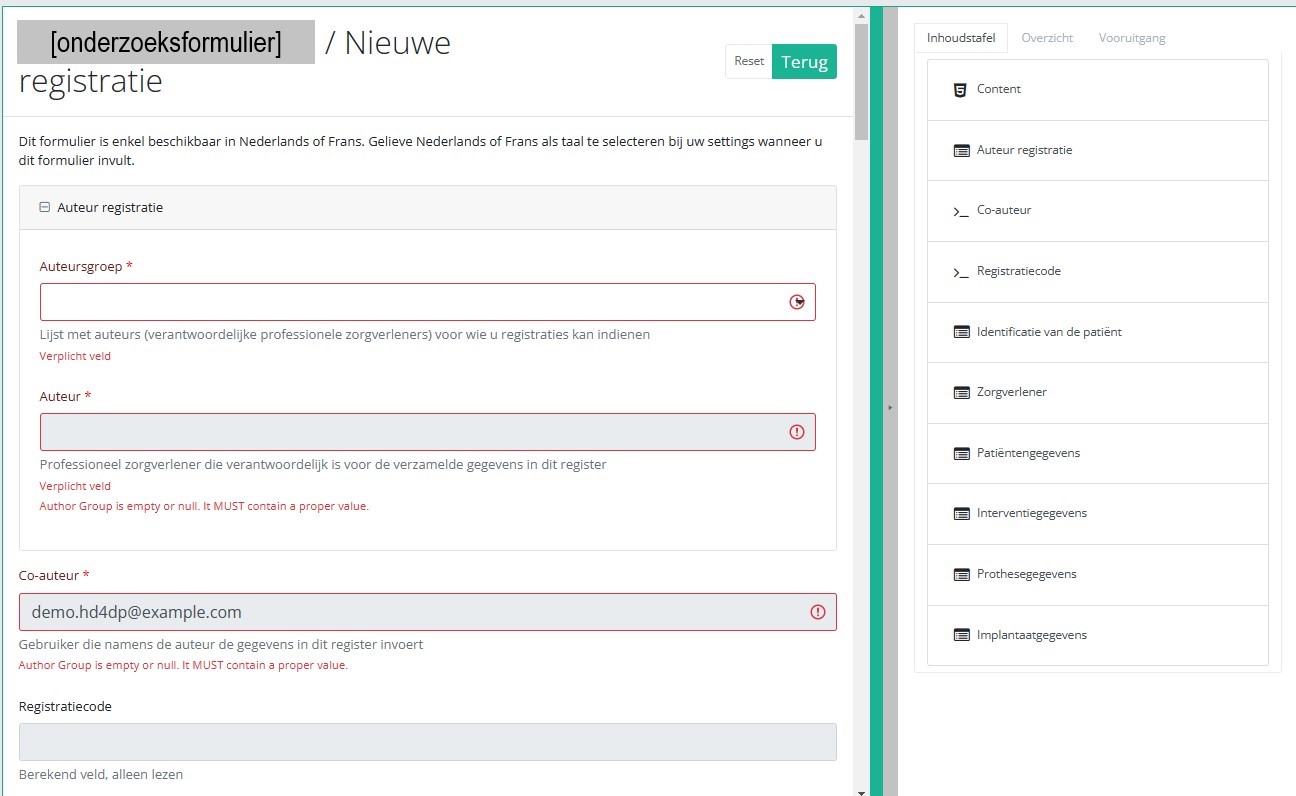
After selection of the "+ New registration" button the main screen will be replaced by 2 sections: a study form in the middle of the screen and a table of contents on the right-hand side of the screen.
By completing the study form you will create a registration for the respective study project.
Table of contents
The Table of contents offers an overview of the sections that are to be completed. It can also be used to navigate through the study form instead of scrolling up and down in the study form: clicking on a section in the table of contents will take you directly to this section in the study form.

Take into account that the study form may contain conditional fields. This means that some fields with selection options ONLY will be displayd IF related fields in previous sections have been completed.
E.g. the field ‘Type implantaat / Type d’implant’ under section ‘Implantaatgegevens / Données d’implant’ ONLY opens up, IF the field ‘Type resectie / Type de résection’ in the section ‘Interventiegegevens / Données de l’intervention’ has been completed.
Detailed information on conditional fields is to be found in the respective DCD specifications.
ATTENTION!
If you want to search and add the data of the implant used, you first have to select the Implant data item in the Table of contents from the right-hand side section of the screen. The relevant item will now appear in the middle section of the screen.
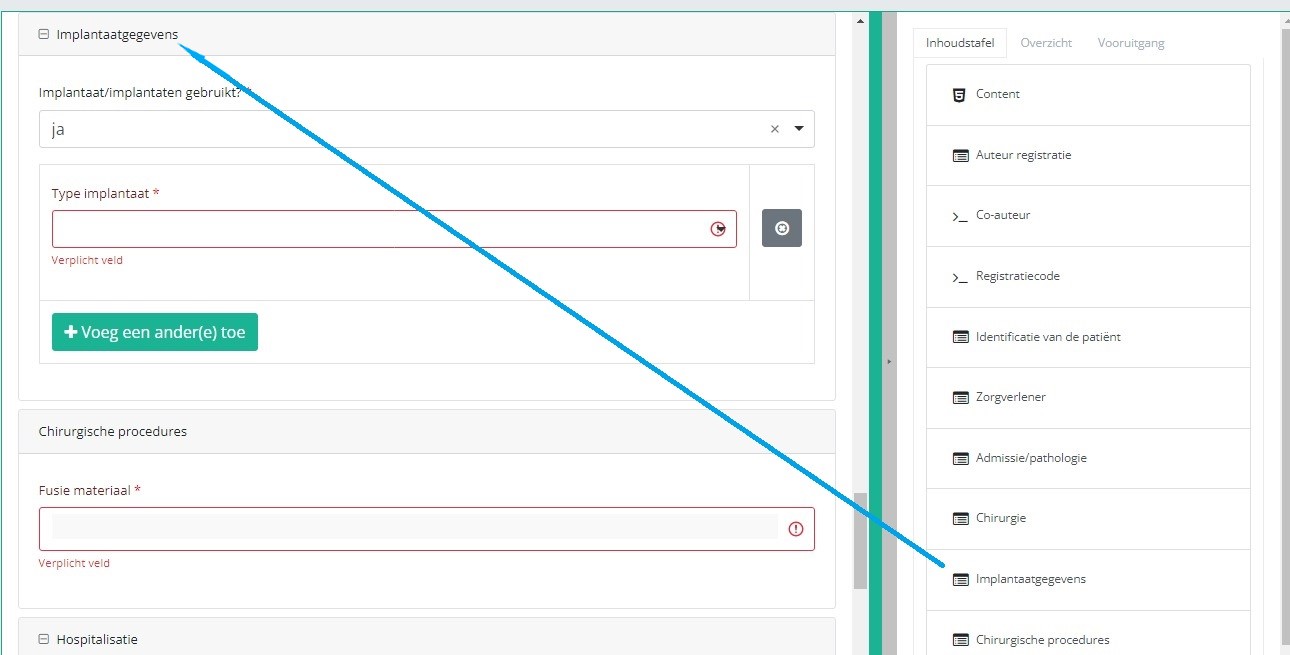
In case an implant with notification code has been used, it is possible to retrieve the corresponding data from the SADMI database. In order to do so, you select yes under Implant(s) used? and implant with notification code under Type of implant.
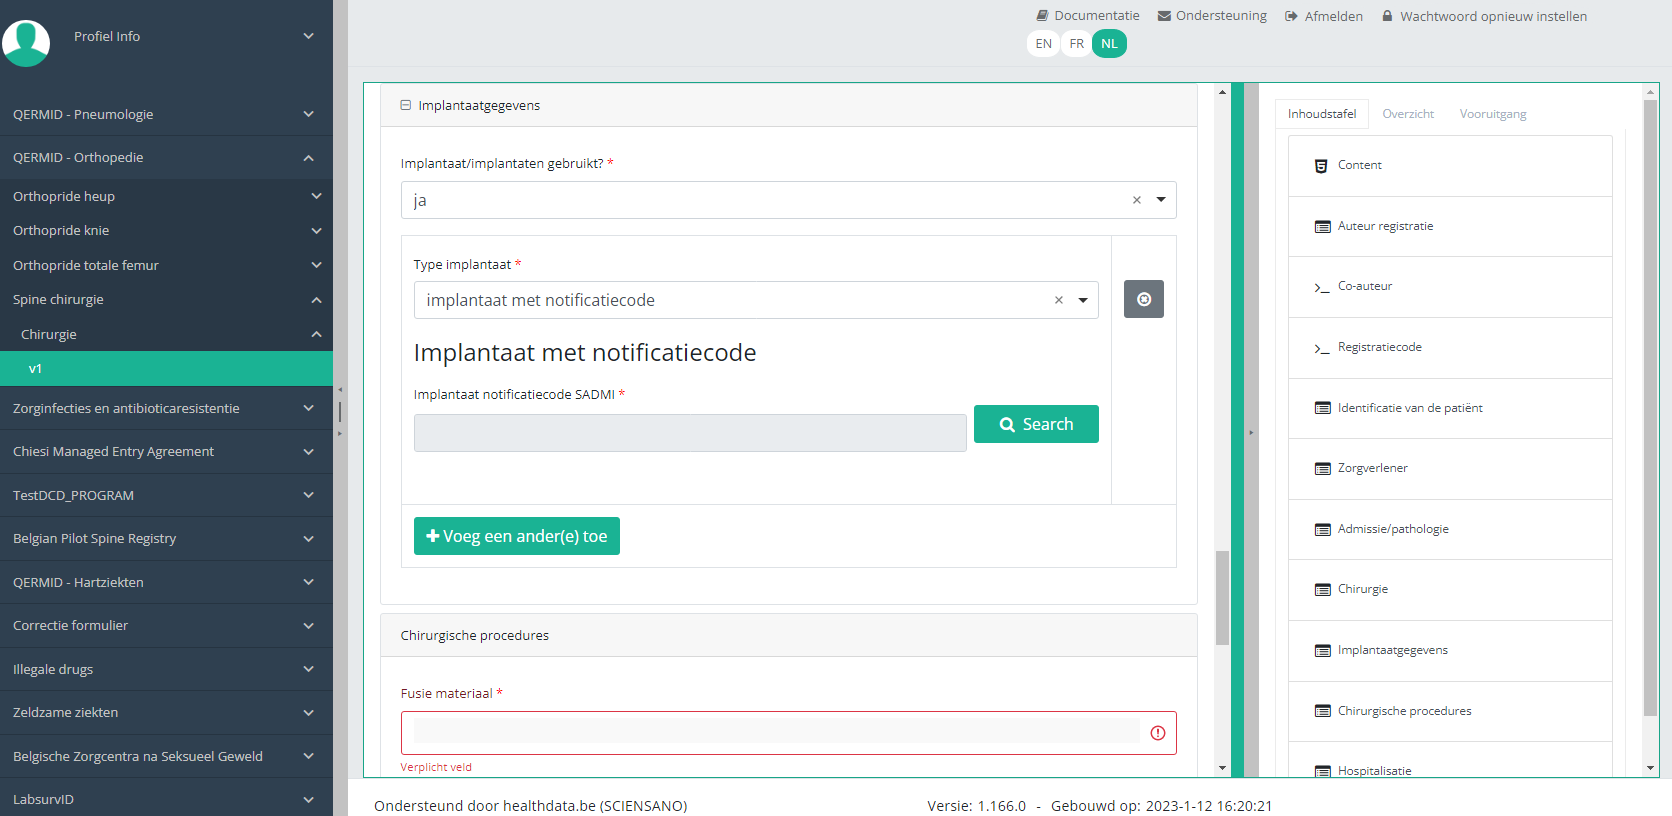
In some interfaces this option is also referred to as genotificeerd serieproduct implantaat. Select this option.
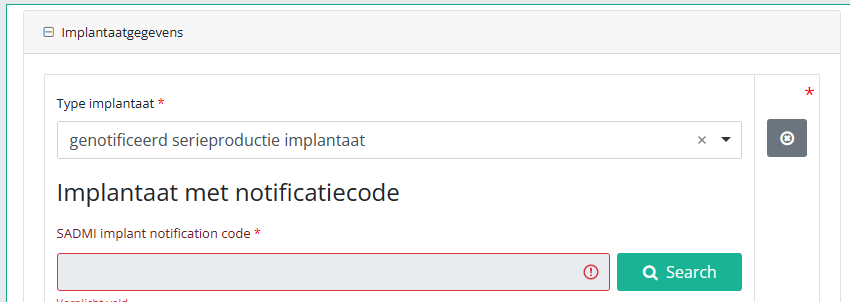
Now, click on the Search button. The SADMI Notification code search window will pop up. Enter the notification code you have available in the relevant field and click on the Search button.
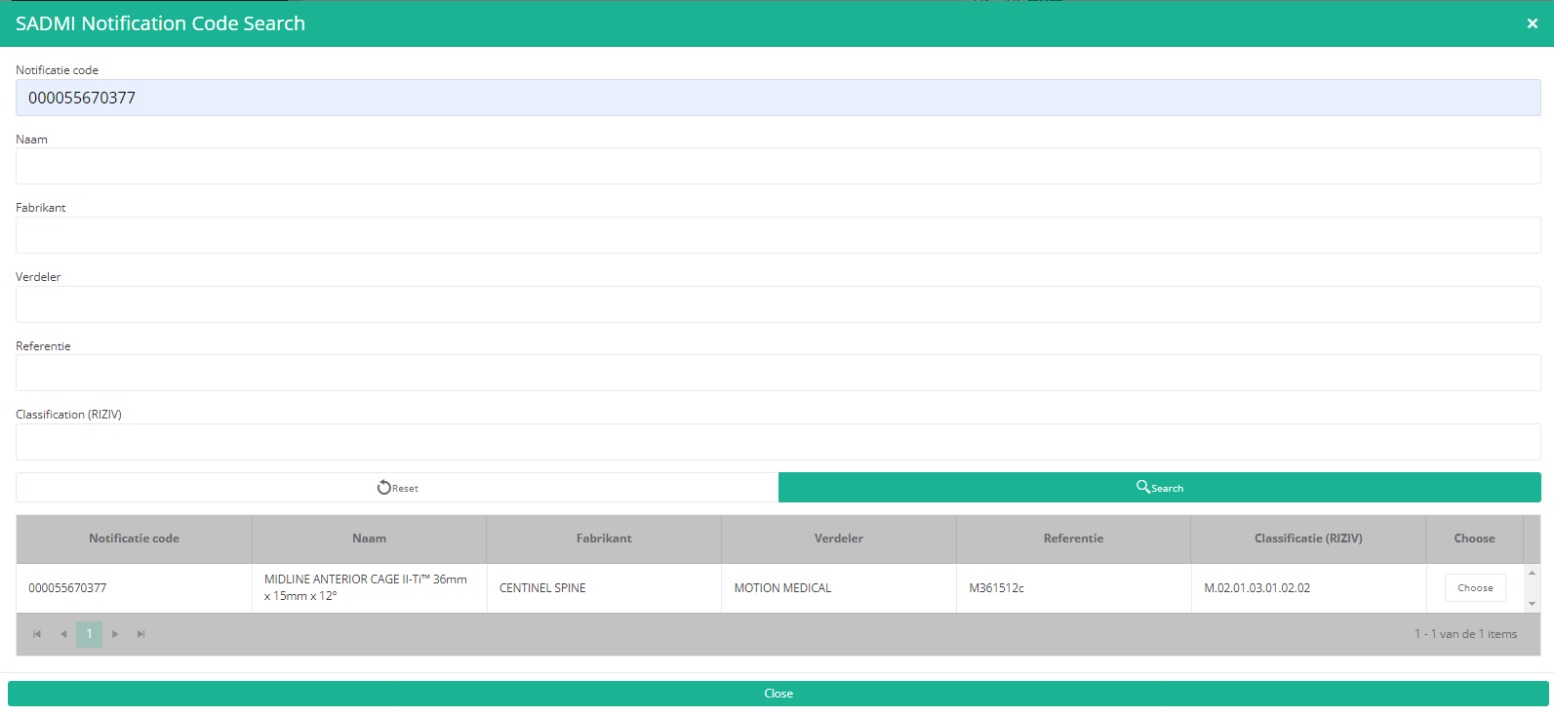
The screen refreshes and shows all implant data underneath the search button.

It is now NECESSARY to select the Choose button to the right in order to effectively ADD the data to the registration form.

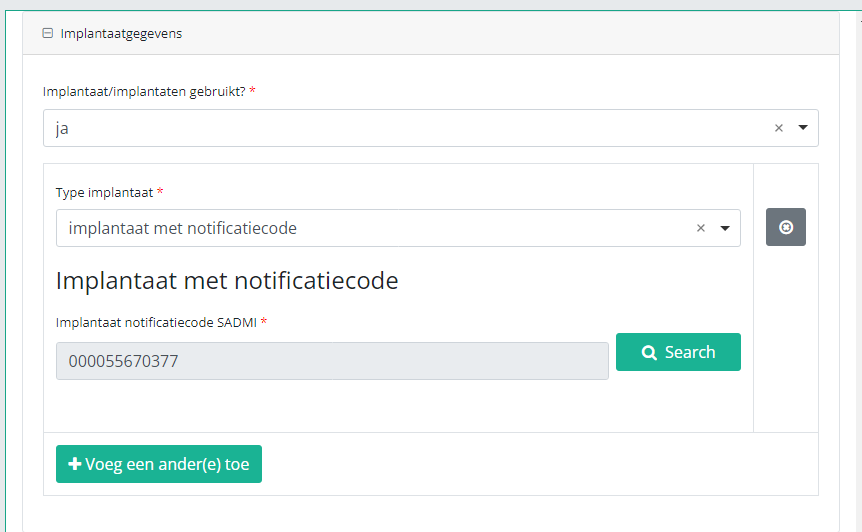
Hereafter, you will automatically return to the registration form, where the SADMI notification code of the implant has been registered. You can now repeat the procedure above to add further implants via the "Add another" button.
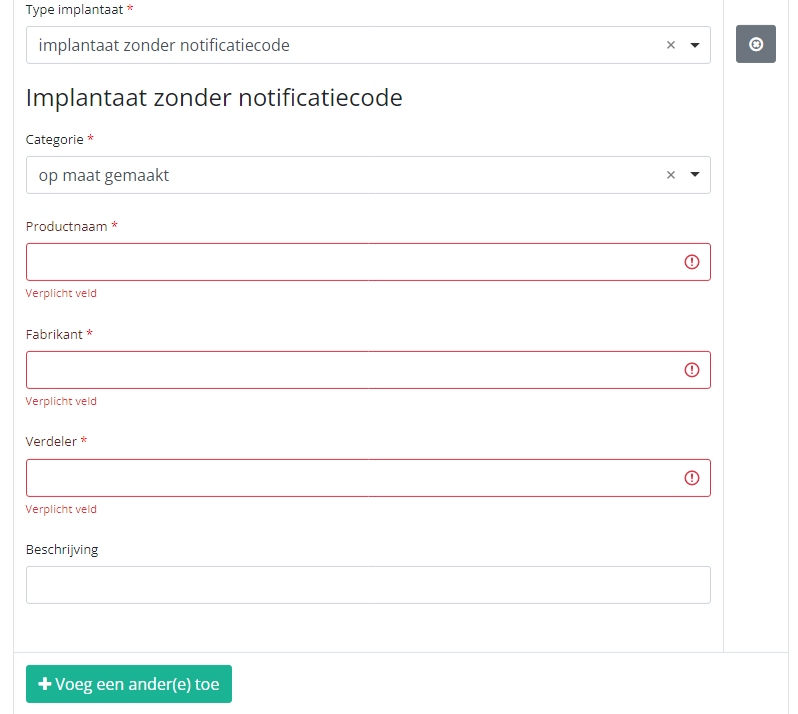
In case an implant without notification code has been used, you have to select the Category and enter the necessary data you have at hand.
Note: SADMI stands for Source Authentique des dispositifs médicaux implantables. General and technical information can be found in the SADMI cookbook which is provided through the eHealth platform.
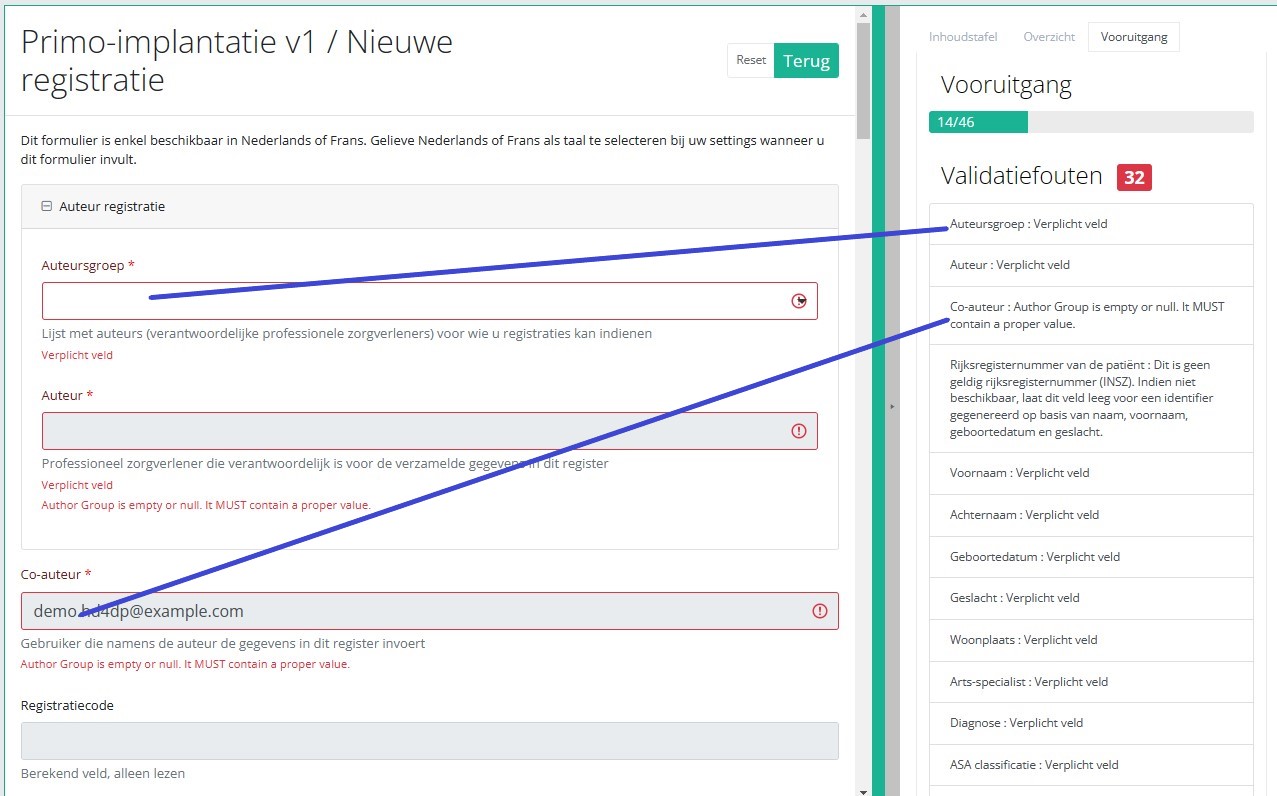
Progress
By selecting the tab "Progress" on the right-hand side of the screen, the table of contents will be replaced by a progress bar and a list of open validation errors).
You can use the list of open validation errors to navigate through the study form: selection of a validation error in the list will take you to this section in the study form.
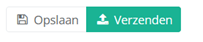
When the study form is completed and there are no validation errors, you can save or submit this registration: Save or Submit. Notice that the Submit button is in clear green.
When the study form is completed but there are validation errors, you can save but not submit this registration: Save but not submit. Notice that the Submit button is in dim green.
When the study form is saved or submitted, the screen switches to the overview table. Now, this table is not empty anymore but shows the saved or submitted registration.
This documentation is being updated regularly. We try to provide as correct, complete and clear as possible information on these pages. Nevertheless, if you see anything in the documentation that is not correct, does not match your experience or requires further clarification, please create a request (type : request for information) via our portal (https://sciensano.service-now.com/sp) or send us an e-mail via support.healthdata@sciensano.be to report this documentation issue. Please, do not forget to mention the URL or web address of the page with the documentation issue. We will then adjust the documentation as soon as possible. Thank you!Create a PACEMAKER "Replacement" registration
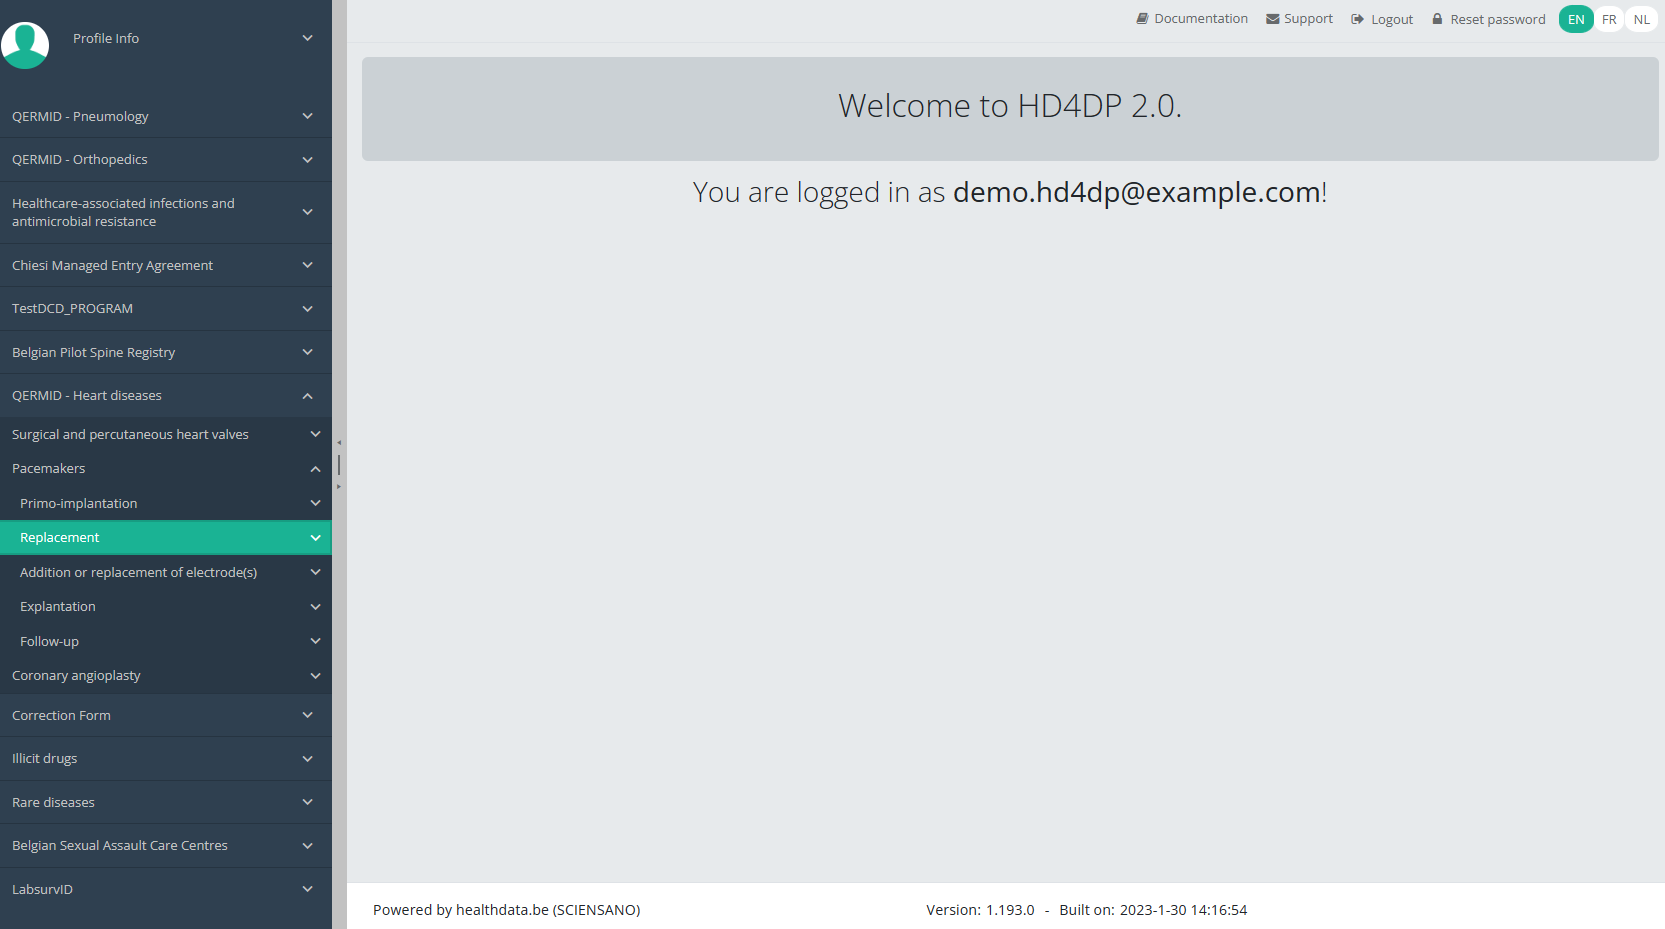
Create a PACEMAKER "Replacement" registrationTo create a Replacement registration for the study project Pacemakers, select "Replacement" in the dark blue left menu.
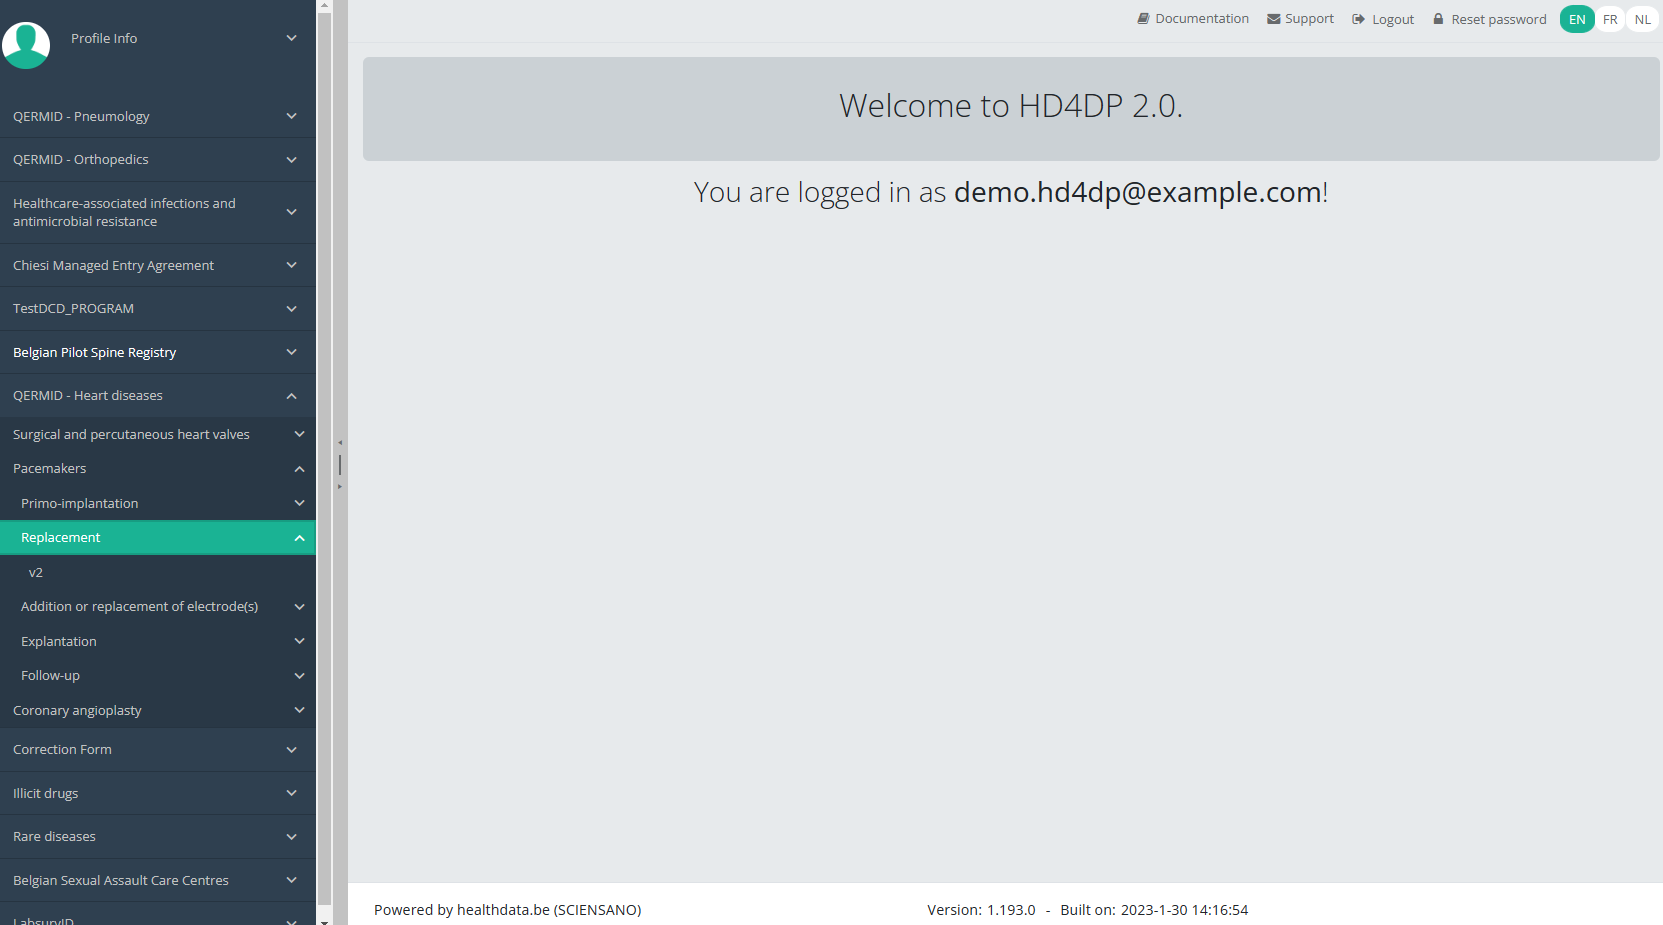
You will see the number of versions of this study section. In this case, there are two versions: v2.
When you select the highest version of this study section for the first time, you will see an empty overview table in the main part of your screen. The table contains, among others, the following items: Registration ID, Progress, Author, Co-author, Unique ID, Business Key, Registration code, National registry ID of the patient ...

NOTE:
The study section is not always available in the selected language. In that case the text frame pictured below covers the language selection buttons. It automatically disappears after a few seconds.
You will have to select the desired language through the respective language buttons:
NL for Dutch, FR for French or EN for English.
In the top right corner of the screen you can find a green button "+ New registration". Select this button.
After selection of the "+ New registration" button the main screen will be replaced by 2 sections: a study form in the middle of the screen and a table of contents on the right-hand side of the screen.
By completing the study form you will create a registration for the respective study project.
Table of contents
The Table of contents offers an overview of the sections that are to be completed. It can also be used to navigate through the study form instead of scrolling up and down in the study form: clicking on a section in the table of contents will take you directly to this section in the study form.
Take into account that the study form may contain conditional fields. This means that some fields with selection options ONLY will be displayd IF related fields in previous sections have been completed.
E.g. the field ‘Type implantaat / Type d’implant’ under section ‘Implantaatgegevens / Données d’implant’ ONLY opens up, IF the field ‘Type resectie / Type de résection’ in the section ‘Interventiegegevens / Données de l’intervention’ has been completed.
Detailed information on conditional fields is to be found in the respective DCD specifications.
ATTENTION!
If you want to search and add the data of the implant used, you first have to select the Implant data item in the Table of contents from the right-hand side section of the screen. The relevant item will now appear in the middle section of the screen.
In case an implant with notification code has been used, it is possible to retrieve the corresponding data from the SADMI database. In order to do so, you select yes under Implant(s) used? and implant with notification code under Type of implant.
In some interfaces this option is also referred to as genotificeerd serieproduct implantaat. Select this option.
Now, click on the Search button. The SADMI Notification code search window will pop up. Enter the notification code you have available in the relevant field and click on the Search button.
The screen refreshes and shows all implant data underneath the search button.
It is now NECESSARY to select the Choose button to the right in order to effectively ADD the data to the registration form.
Hereafter, you will automatically return to the registration form, where the SADMI notification code of the implant has been registered. You can now repeat the procedure above to add further implants via the "Add another" button.
In case an implant without notification code has been used, you have to select the Category and enter the necessary data you have at hand.
Note: SADMI stands for Source Authentique des dispositifs médicaux implantables. General and technical information can be found in the SADMI cookbook which is provided through the eHealth platform.
Progress
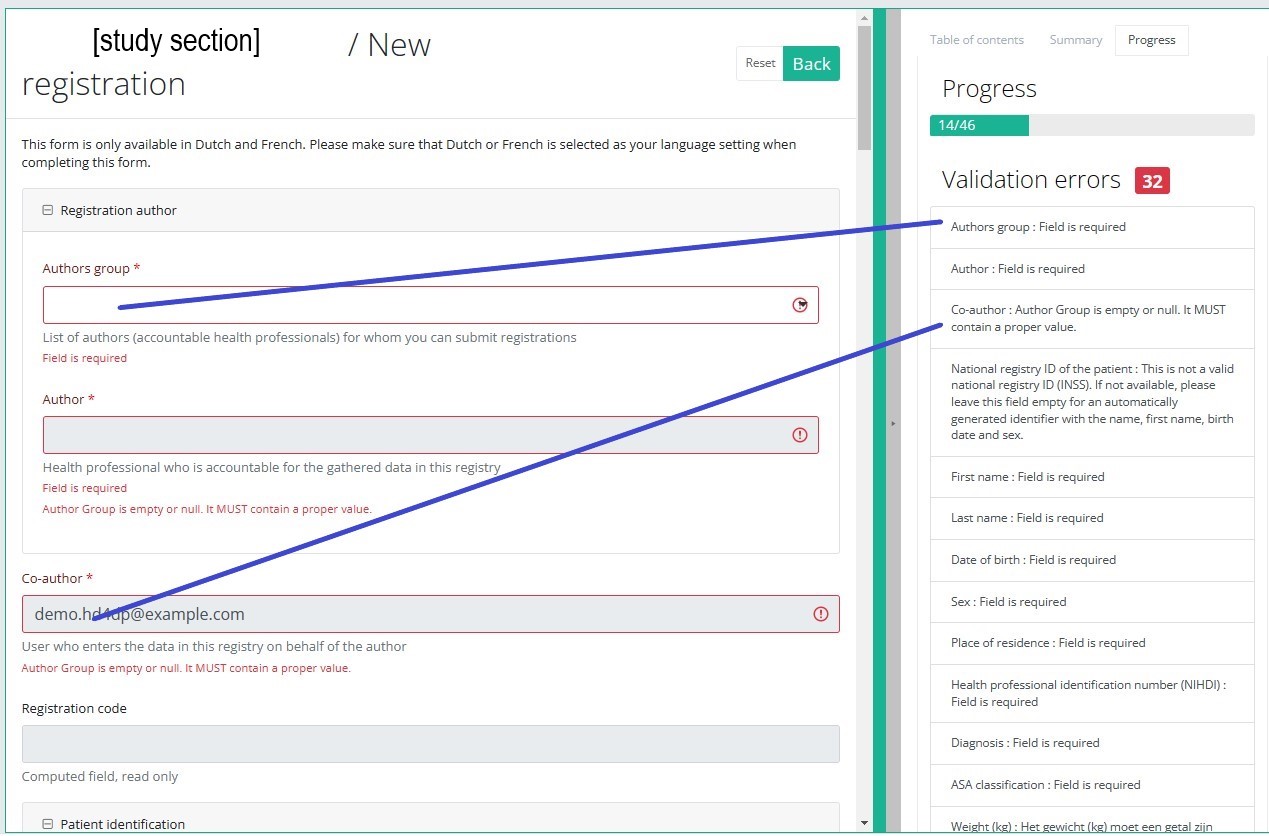
By selecting the tab "Progress" on the right-hand side of the screen, the table of contents will be replaced by a progress bar and a list of open validation errors).
You can use the list of open validation errors to navigate through the study form: selection of a validation error in the list will take you to this section in the study form.
When the study form is completed and there are no validation errors, you can save or submit this registration: Save or Submit. Notice that the Submit button is in clear green.
When the study form is completed but there are validation errors, you can save but not submit this registration: Save but not submit. Notice that the Submit button is in dim green.
When the study form is saved or submitted, the screen switches to the overview table. Now, this table is not empty anymore but shows the saved or submitted registration.
This documentation is being updated regularly. We try to provide as correct, complete and clear as possible information on these pages. Nevertheless, if you see anything in the documentation that is not correct, does not match your experience or requires further clarification, please create a request (type : request for information) via our portal (https://sciensano.service-now.com/sp) or send us an e-mail via support.healthdata@sciensano.be to report this documentation issue. Please, do not forget to mention the URL or web address of the page with the documentation issue. We will then adjust the documentation as soon as possible. Thank you!Create a PACEMAKER "Addition or replacement of electrode(s)" registration
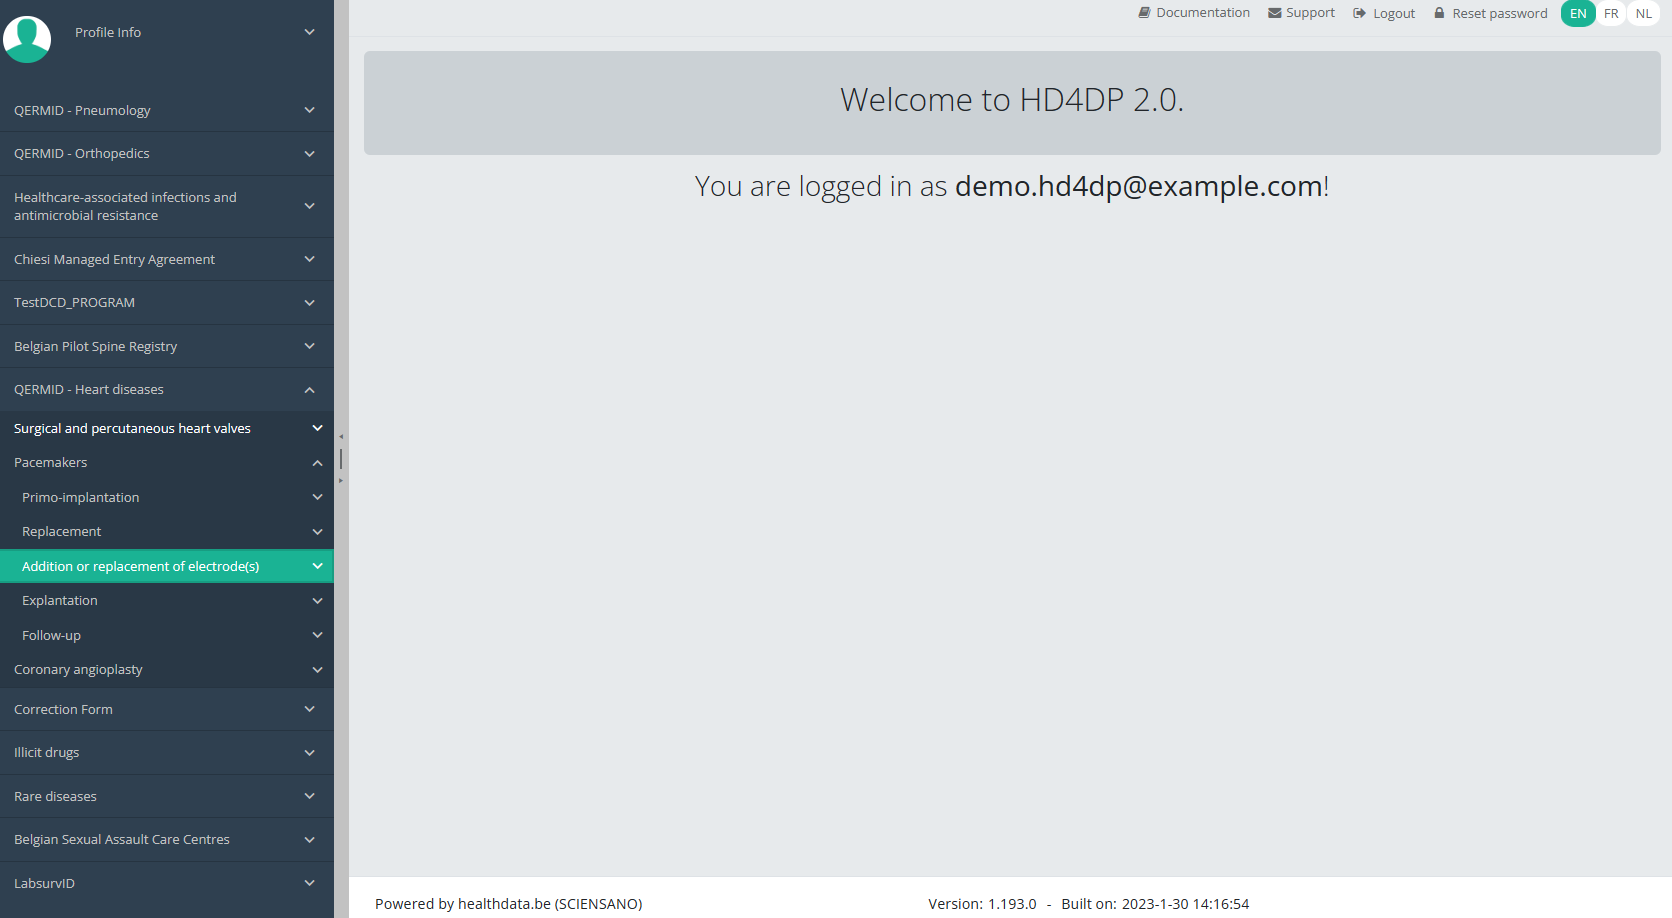
Create a PACEMAKER "Addition or replacement of electrode(s)" registrationTo create an Addition or replacement of electrode(s) registration for the study project Pacemakers, select "Addition or replacement of electrode(s)" in the dark blue left menu.
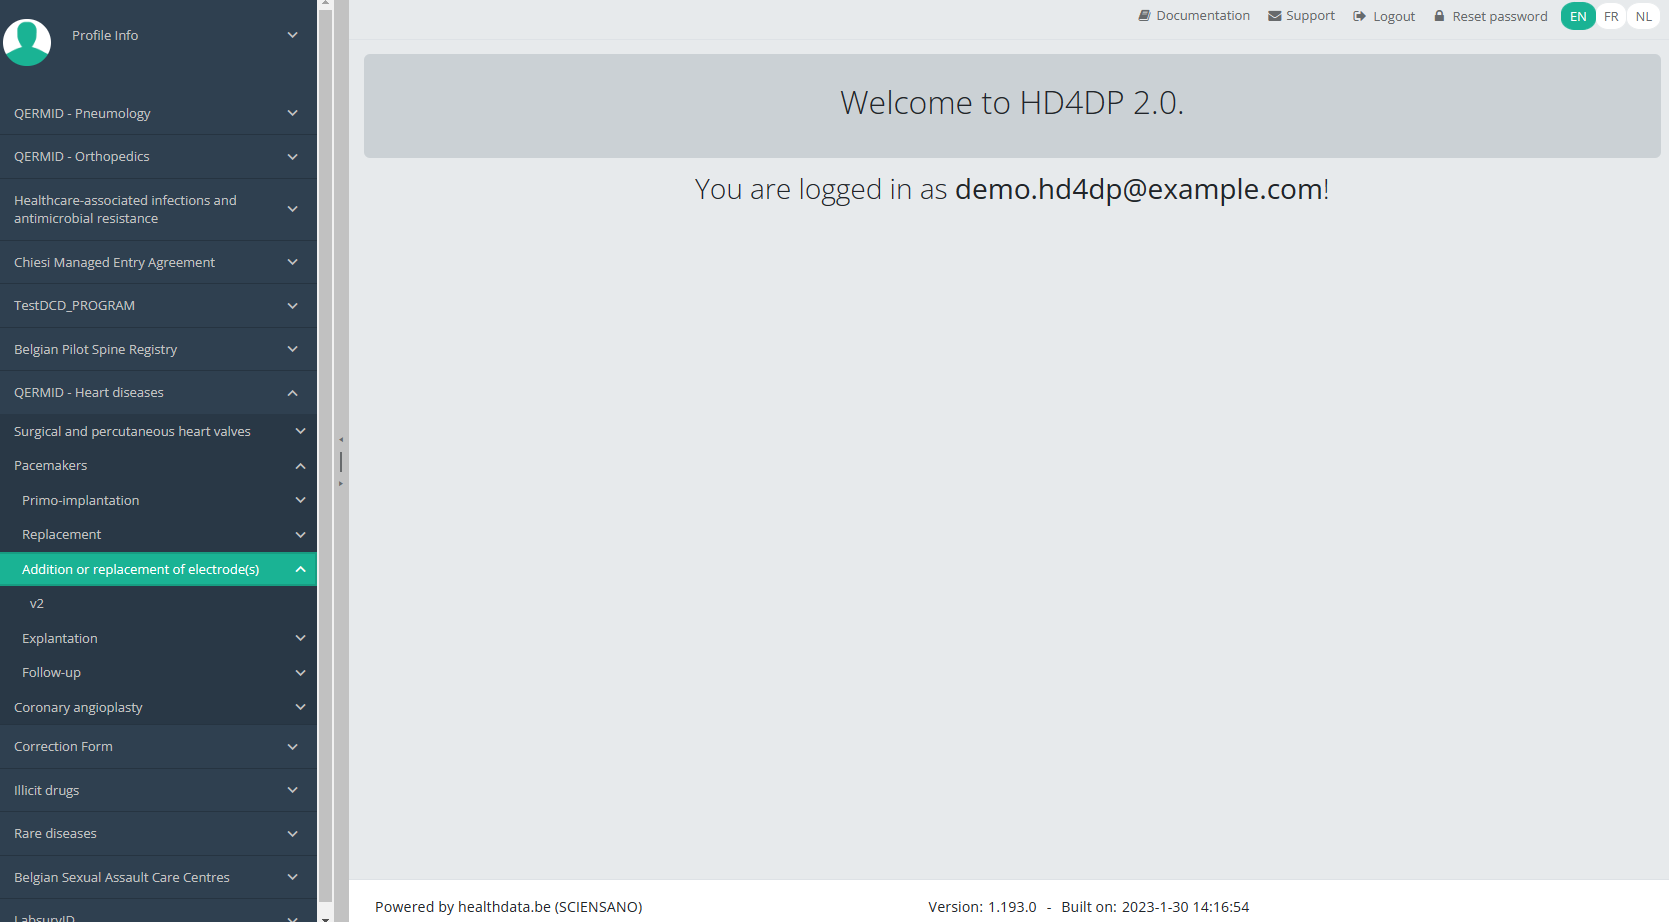
You will see the number of versions of this study section. In this case, there are two versions: v2.
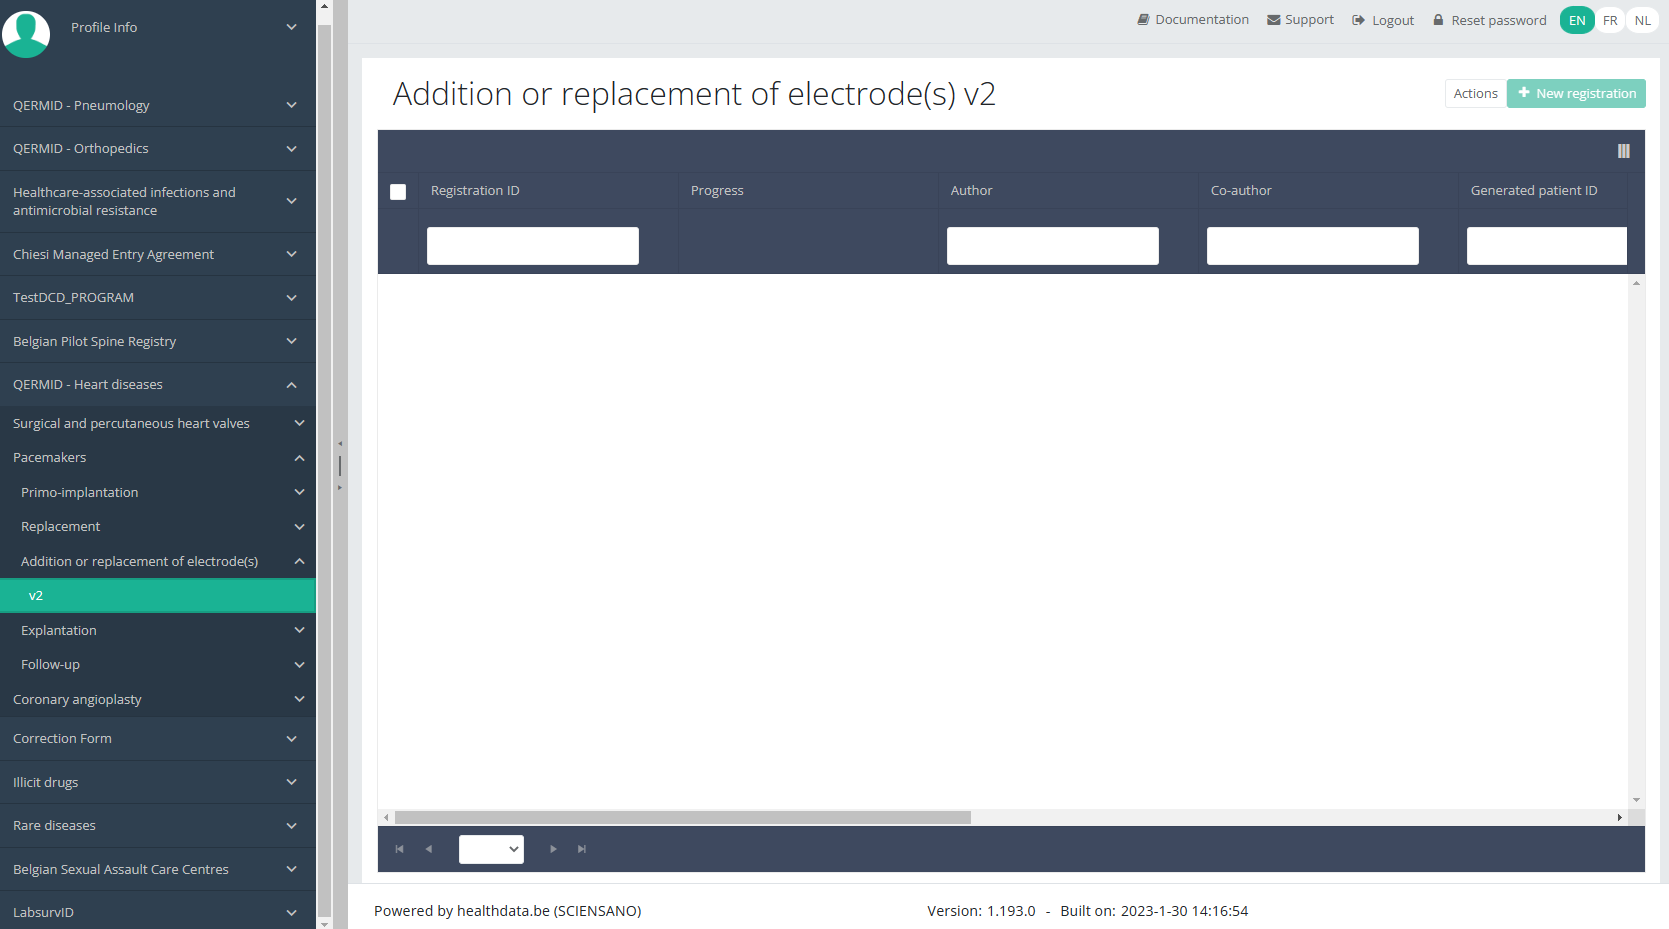
When you select the highest version of this study section for the first time, you will see an empty overview table in the main part of your screen. The table contains, among others, the following items: Registration ID, Progress, Author, Co-author, Unique ID, Business Key, Registration code, National registry ID of the patient ...
NOTE:
The study section is not always available in the selected language. In that case the text frame pictured below covers the language selection buttons. It automatically disappears after a few seconds.
You will have to select the desired language through the respective language buttons:
NL for Dutch, FR for French or EN for English.
In the top right corner of the screen you can find a green button "+ New registration". Select this button.
After selection of the "+ New registration" button the main screen will be replaced by 2 sections: a study form in the middle of the screen and a table of contents on the right-hand side of the screen.
By completing the study form you will create a registration for the respective study project.
Table of contents
The Table of contents offers an overview of the sections that are to be completed. It can also be used to navigate through the study form instead of scrolling up and down in the study form: clicking on a section in the table of contents will take you directly to this section in the study form.
Take into account that the study form may contain conditional fields. This means that some fields with selection options ONLY will be displayd IF related fields in previous sections have been completed.
E.g. the field ‘Type implantaat / Type d’implant’ under section ‘Implantaatgegevens / Données d’implant’ ONLY opens up, IF the field ‘Type resectie / Type de résection’ in the section ‘Interventiegegevens / Données de l’intervention’ has been completed.
Detailed information on conditional fields is to be found in the respective DCD specifications.
ATTENTION!
If you want to search and add the data of the implant used, you first have to select the Implant data item in the Table of contents from the right-hand side section of the screen. The relevant item will now appear in the middle section of the screen.
In case an implant with notification code has been used, it is possible to retrieve the corresponding data from the SADMI database. In order to do so, you select yes under Implant(s) used? and implant with notification code under Type of implant.
In some interfaces this option is also referred to as genotificeerd serieproduct implantaat. Select this option.
Now, click on the Search button. The SADMI Notification code search window will pop up. Enter the notification code you have available in the relevant field and click on the Search button.
The screen refreshes and shows all implant data underneath the search button.
It is now NECESSARY to select the Choose button to the right in order to effectively ADD the data to the registration form.
Hereafter, you will automatically return to the registration form, where the SADMI notification code of the implant has been registered. You can now repeat the procedure above to add further implants via the "Add another" button.
In case an implant without notification code has been used, you have to select the Category and enter the necessary data you have at hand.
Note: SADMI stands for Source Authentique des dispositifs médicaux implantables. General and technical information can be found in the SADMI cookbook which is provided through the eHealth platform.
Progress
By selecting the tab "Progress" on the right-hand side of the screen, the table of contents will be replaced by a progress bar and a list of open validation errors).
You can use the list of open validation errors to navigate through the study form: selection of a validation error in the list will take you to this section in the study form.
When the study form is completed and there are no validation errors, you can save or submit this registration: Save or Submit. Notice that the Submit button is in clear green.
When the study form is completed but there are validation errors, you can save but not submit this registration: Save but not submit. Notice that the Submit button is in dim green.
When the study form is saved or submitted, the screen switches to the overview table. Now, this table is not empty anymore but shows the saved or submitted registration.
This documentation is being updated regularly. We try to provide as correct, complete and clear as possible information on these pages. Nevertheless, if you see anything in the documentation that is not correct, does not match your experience or requires further clarification, please create a request (type : request for information) via our portal (https://sciensano.service-now.com/sp) or send us an e-mail via support.healthdata@sciensano.be to report this documentation issue. Please, do not forget to mention the URL or web address of the page with the documentation issue. We will then adjust the documentation as soon as possible. Thank you!Create a PACEMAKER "Explantation" registration
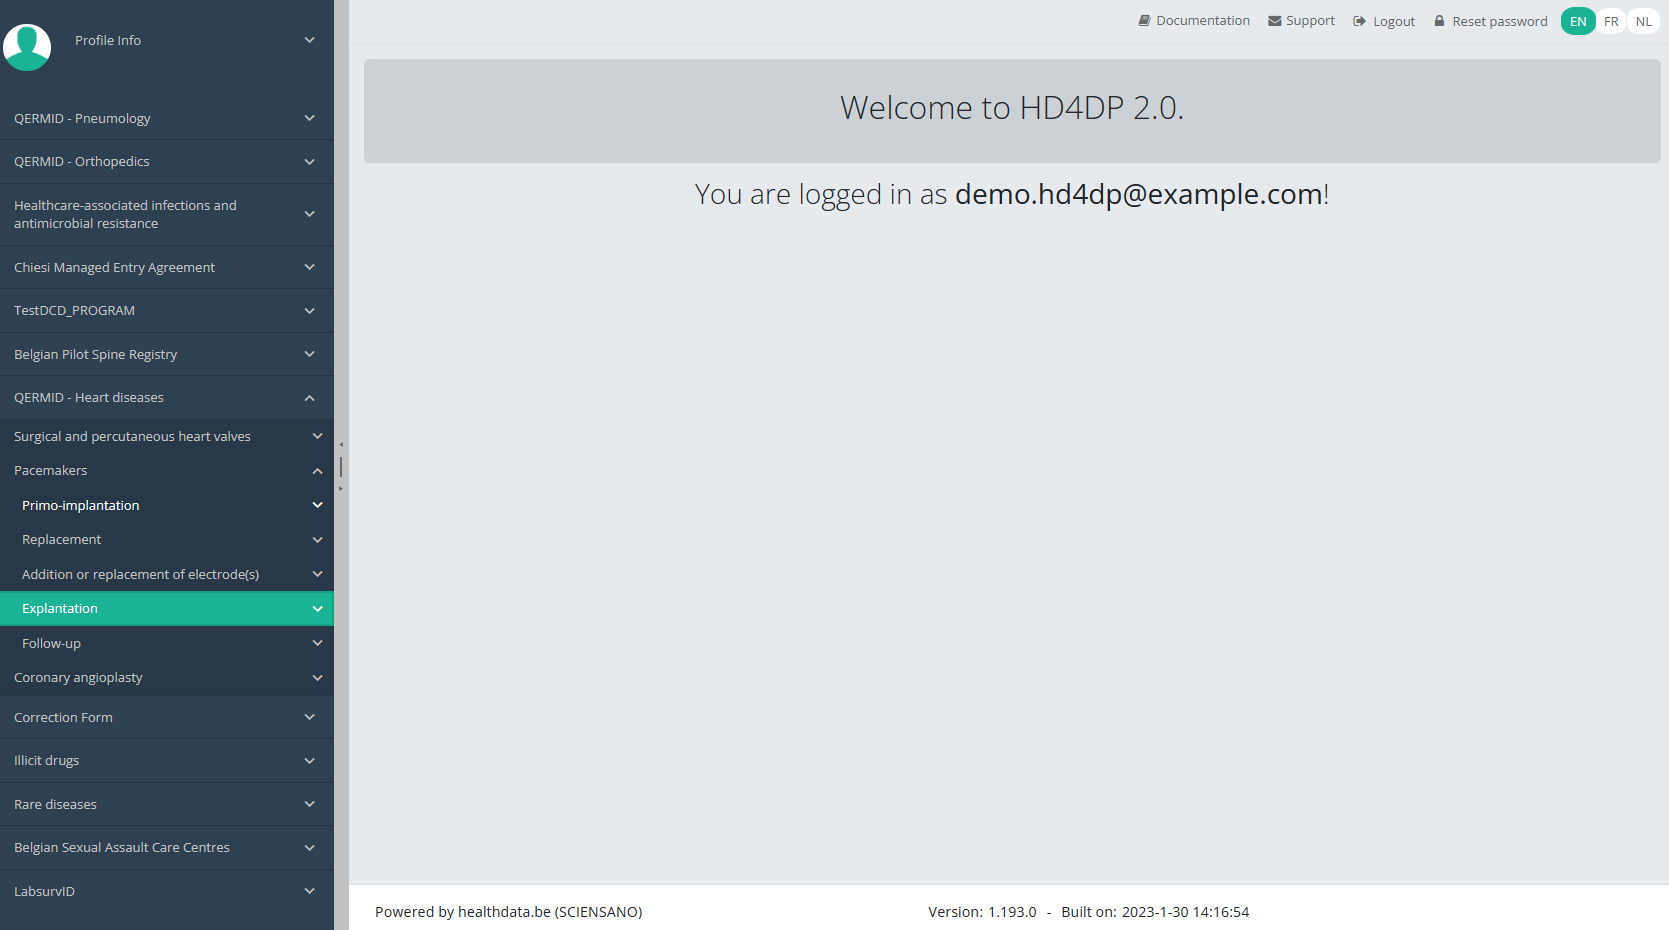
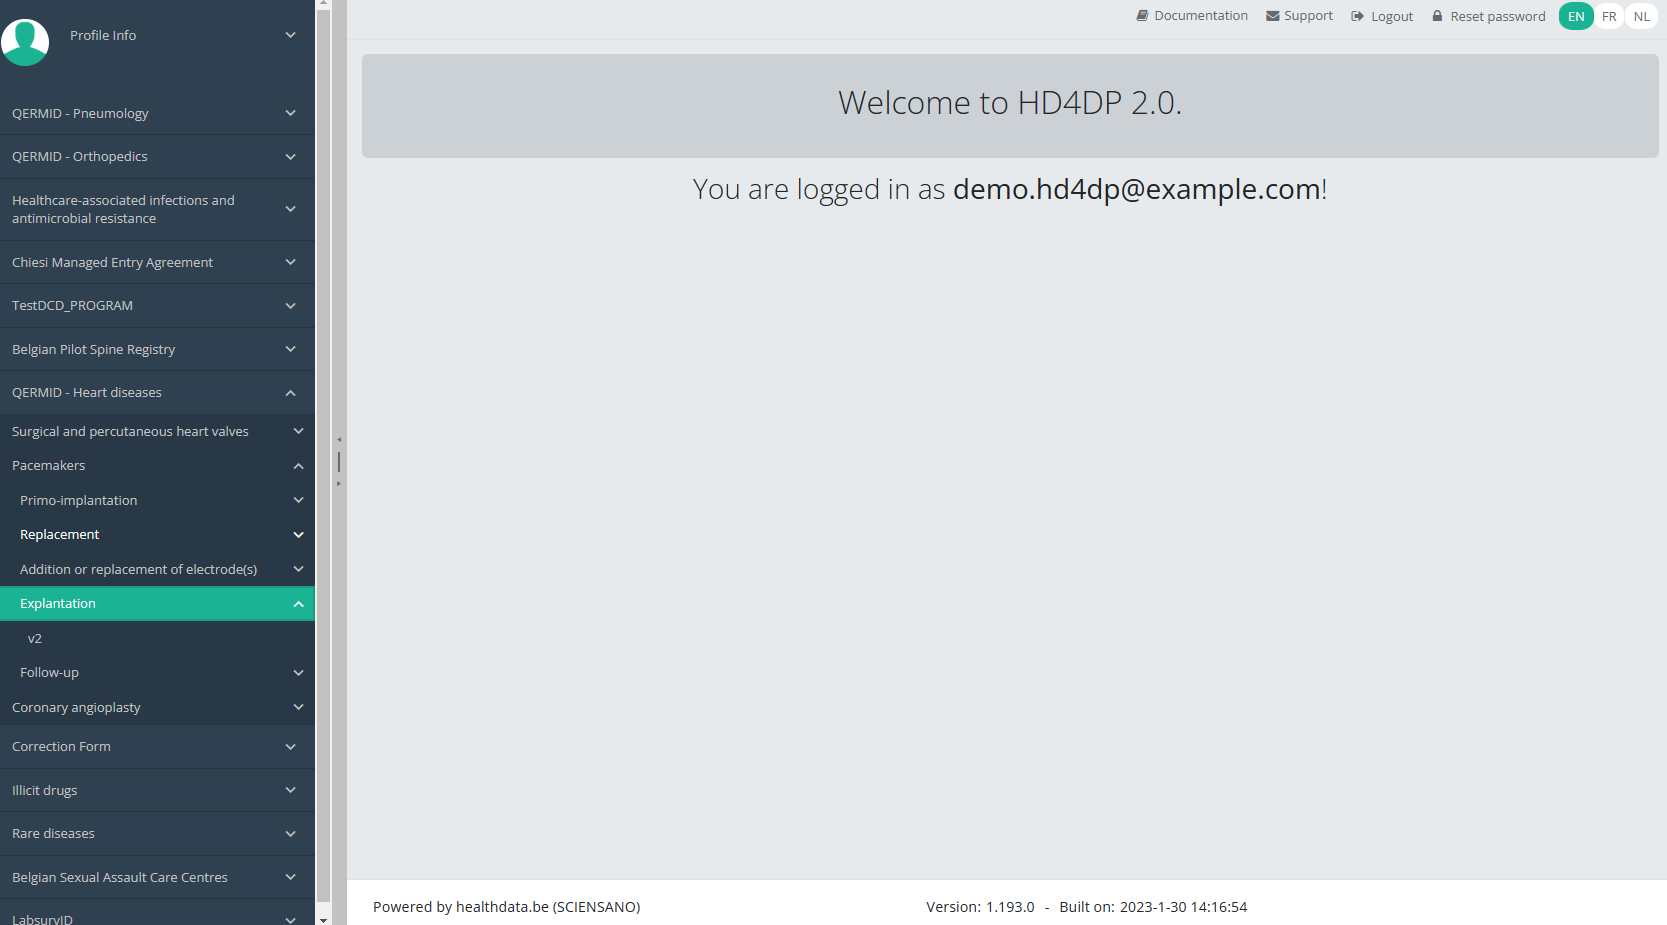
Create a PACEMAKER "Explantation" registrationTo create an Explantation registration for the study project Pacemakers, select "Explantation" in the dark blue left menu.
You will see the number of versions of this study section. In this case, there are two versions: v2.
When you select the highest version of this study section for the first time, you will see an empty overview table in the main part of your screen. The table contains, among others, the following items: Registration ID, Progress, Author, Co-author, Unique ID, Business Key, Registration code, National registry ID of the patient ...

NOTE:
The study section is not always available in the selected language. In that case the text frame pictured below covers the language selection buttons. It automatically disappears after a few seconds.
You will have to select the desired language through the respective language buttons:
NL for Dutch, FR for French or EN for English.
In the top right corner of the screen you can find a green button "+ New registration". Select this button.
After selection of the "+ New registration" button the main screen will be replaced by 2 sections: a study form in the middle of the screen and a table of contents on the right-hand side of the screen.
By completing the study form you will create a registration for the respective study project.
Table of contents
The Table of contents offers an overview of the sections that are to be completed. It can also be used to navigate through the study form instead of scrolling up and down in the study form: clicking on a section in the table of contents will take you directly to this section in the study form.
Take into account that the study form may contain conditional fields. This means that some fields with selection options ONLY will be displayd IF related fields in previous sections have been completed.
E.g. the field ‘Type implantaat / Type d’implant’ under section ‘Implantaatgegevens / Données d’implant’ ONLY opens up, IF the field ‘Type resectie / Type de résection’ in the section ‘Interventiegegevens / Données de l’intervention’ has been completed.
Detailed information on conditional fields is to be found in the respective DCD specifications.
ATTENTION!
If you want to search and add the data of the implant used, you first have to select the Implant data item in the Table of contents from the right-hand side section of the screen. The relevant item will now appear in the middle section of the screen.
In case an implant with notification code has been used, it is possible to retrieve the corresponding data from the SADMI database. In order to do so, you select yes under Implant(s) used? and implant with notification code under Type of implant.
In some interfaces this option is also referred to as genotificeerd serieproduct implantaat. Select this option.
Now, click on the Search button. The SADMI Notification code search window will pop up. Enter the notification code you have available in the relevant field and click on the Search button.
The screen refreshes and shows all implant data underneath the search button.
It is now NECESSARY to select the Choose button to the right in order to effectively ADD the data to the registration form.
Hereafter, you will automatically return to the registration form, where the SADMI notification code of the implant has been registered. You can now repeat the procedure above to add further implants via the "Add another" button.
In case an implant without notification code has been used, you have to select the Category and enter the necessary data you have at hand.
Note: SADMI stands for Source Authentique des dispositifs médicaux implantables. General and technical information can be found in the SADMI cookbook which is provided through the eHealth platform.
Progress
By selecting the tab "Progress" on the right-hand side of the screen, the table of contents will be replaced by a progress bar and a list of open validation errors).
You can use the list of open validation errors to navigate through the study form: selection of a validation error in the list will take you to this section in the study form.
When the study form is completed and there are no validation errors, you can save or submit this registration: Save or Submit. Notice that the Submit button is in clear green.
When the study form is completed but there are validation errors, you can save but not submit this registration: Save but not submit. Notice that the Submit button is in dim green.
When the study form is saved or submitted, the screen switches to the overview table. Now, this table is not empty anymore but shows the saved or submitted registration.
This documentation is being updated regularly. We try to provide as correct, complete and clear as possible information on these pages. Nevertheless, if you see anything in the documentation that is not correct, does not match your experience or requires further clarification, please create a request (type : request for information) via our portal (https://sciensano.service-now.com/sp) or send us an e-mail via support.healthdata@sciensano.be to report this documentation issue. Please, do not forget to mention the URL or web address of the page with the documentation issue. We will then adjust the documentation as soon as possible. Thank you!Create a PACEMAKER "Follow-up" registration
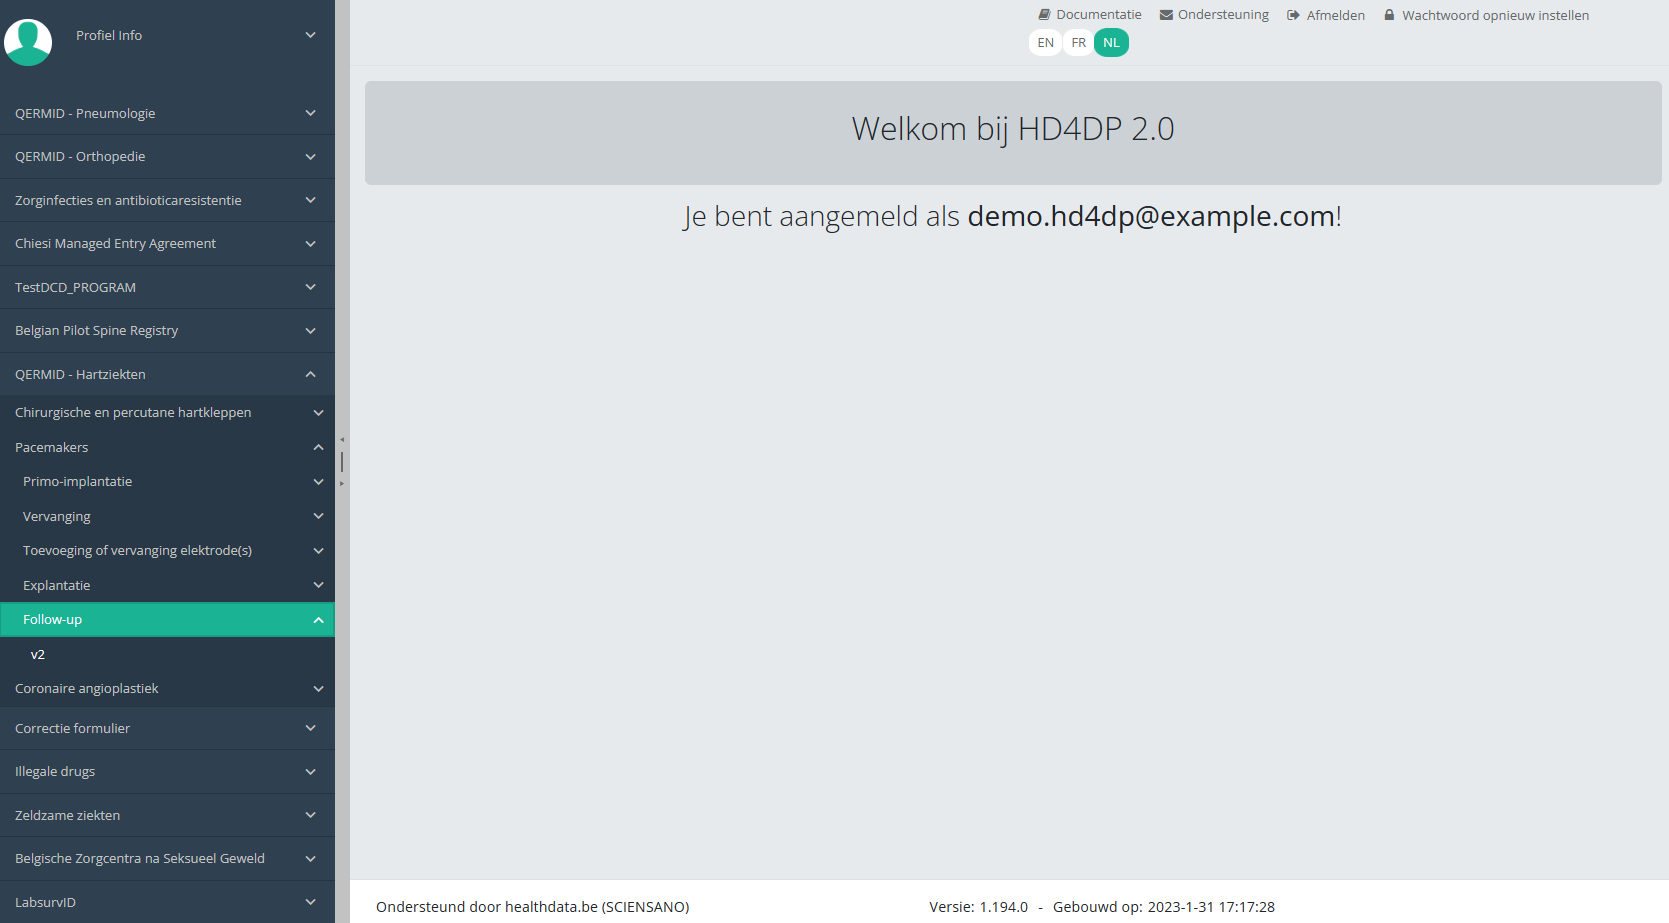
Create a PACEMAKER "Follow-up" registrationOm een Follow-up registratie te creëren voor het studieproject Pacemakers, selecteert u "Follow-up" in het donkerblauwe menu links op uw scherm.
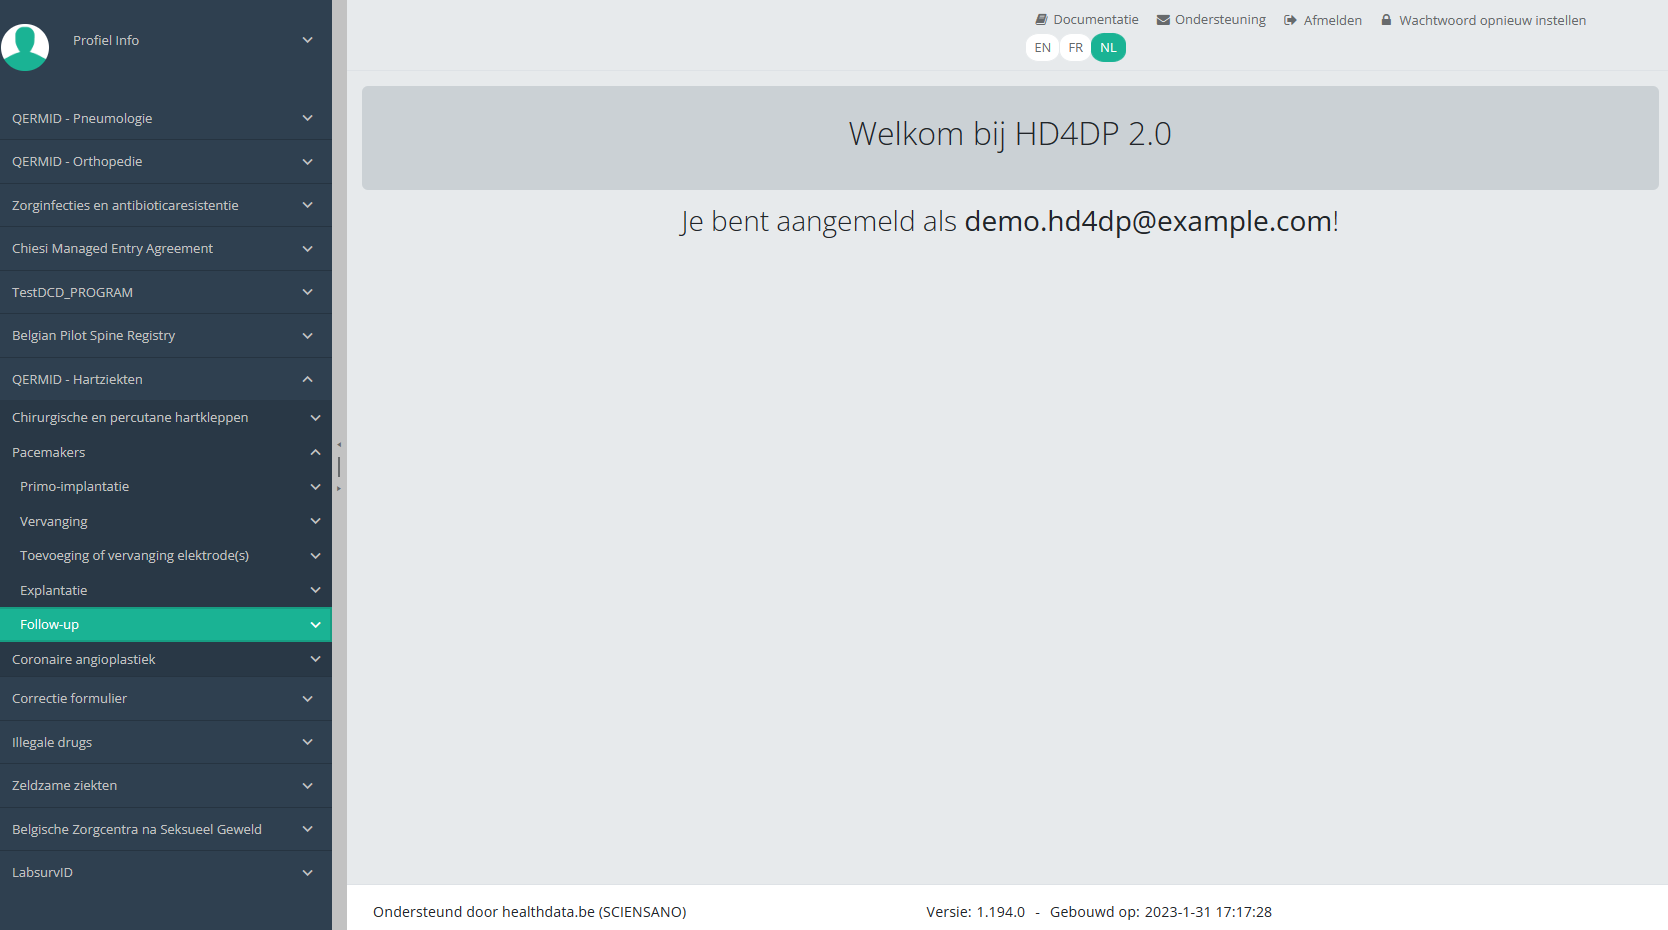
U ziet het aantal versies van het studieonderdeel. In dit geval gaat het om de tweede versie: v2.
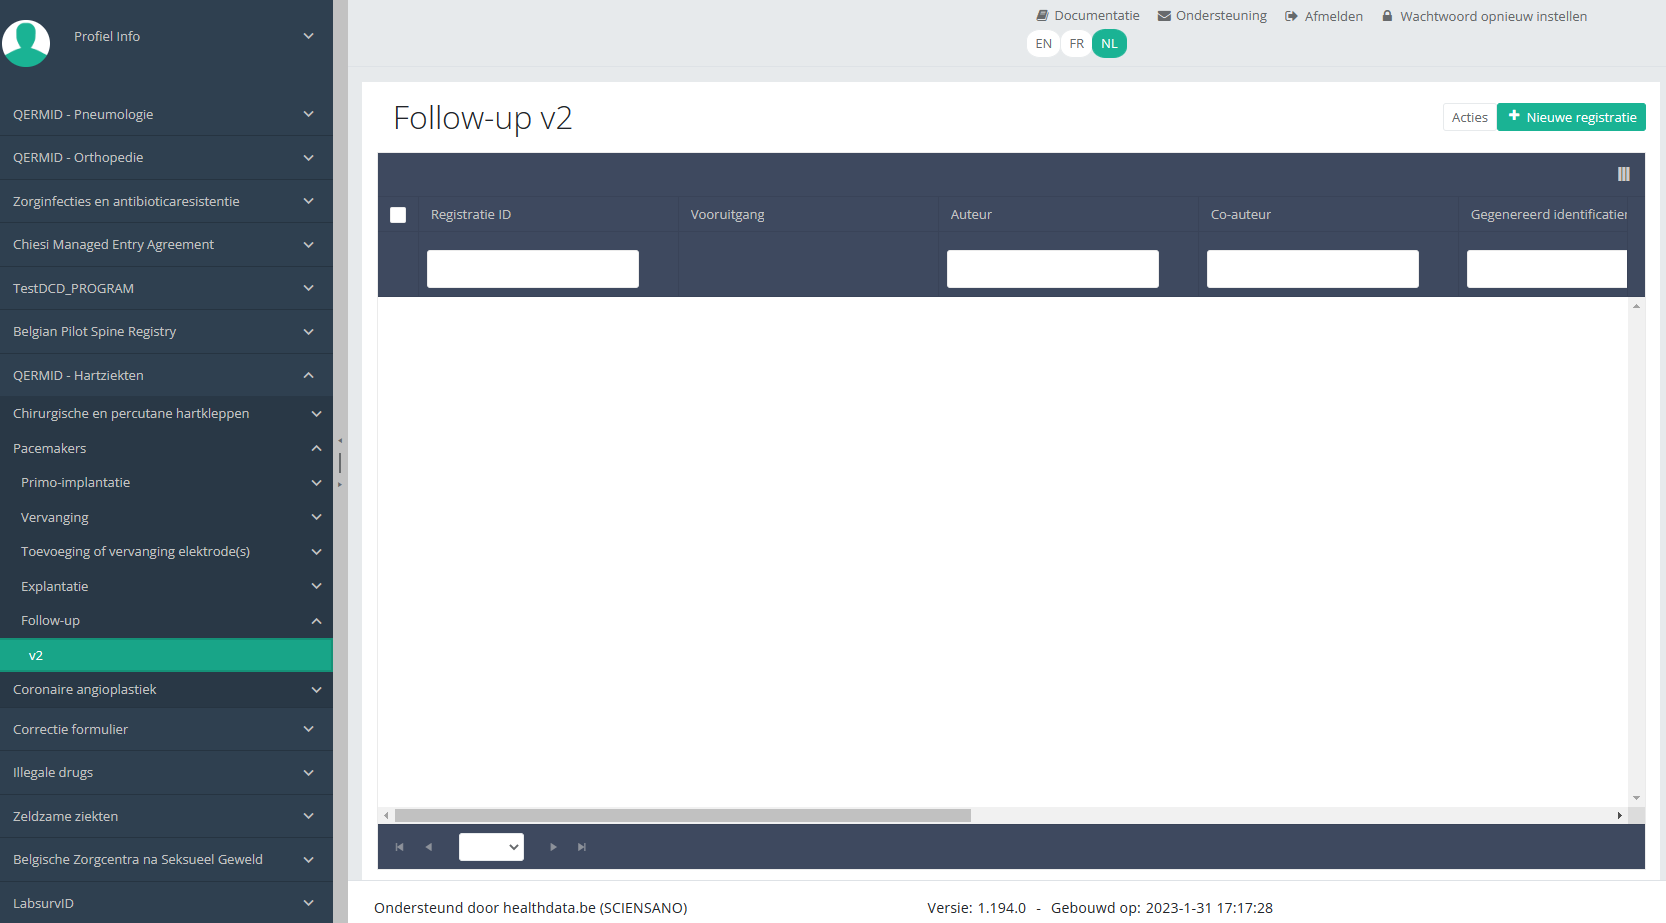
Wanneer u voor de eerste keer de hoogste versie van dit studieonderdeel selecteert, ziet u een lege overzichtstabel in het hoofdgedeelte van uw scherm. De tabel bevat onder andere de volgende items: Registratie ID, Vooruitgang, Auteur, Co-auteur, Unieke ID, Business Key, Registratiecode, Rijksregisternummer van de patiënt...
OPMERKING:
Het studieonderdeel is niet altijd beschikbaar in de geselecteerde taal. In dat geval wordt het hieronder afgebeelde tekstvak over de taalselectieknoppen weergegeven. Het verdwijnt automatisch na enkele seconden.
Selecteer de gewenste taal via de respectieve taalselectieknoppen:
NL voor Nederlands, FR voor Frans of EN voor Engels.
In de rechter bovenhoek van het scherm ziet u een groene knop + Nieuwe registratie. Selecteer deze knop.
Nadat u de knop "+ Nieuwe registratie" hebt geselecteerd, wordt het hoofdscherm in 2 secties verdeeld: een onderzoeksformulier (in het midden van het scherm) en een inhoudstafel (aan de rechterkant van het scherm).
Door het onderzoeksformulier in te vullen, creëert u een registratie voor het respectieve studieproject.
Inhoudstafel
De Inhoudstafel geeft aan welke onderdelen u moet invullen. U kunt de inhoudstafel ook gebruiken om door het onderzoeksformulier te navigeren: door op een onderdeel in de inhoudstafel te klikken, gaat u naar dit onderdeel in het onderzoeksformulier.
ATTENTIE!
Indien u de gegevens van het gebruikte implantaat wilt opzoeken en toevoegen, selecteert u eerst het item Implantaatgegevens in de inhoudstafel in de rechter sectie van het scherm. Het overeenkomstige item wordt nu geopend in de middelste sectie van het scherm.
Indien een implantaat met notificatiecode werd gebruikt, kunt u de respectieve data uit de SADMI database halen. Hiervoor selecteert u ja onder Implantaat/implantaten gebruikt? en implantaat met notificatiecode onder Type implantaat.
Deze optie heet in sommige interfaces ook genotificeerd serieproduct implantaat. Selecteer deze optie.
Klik nu op de knop Search. Het pop-upvenster SADMI Notification code search verschijnt. Voer de beschikbare notificatiecode in het betreffende veld in en klik op Search.
Het scherm wordt vernieuwd en alle implantaatgegevens worden onder de knop Search weergegeven.
Het is nu NOODZAKELIJK om rechts van de gegevens op de knop Choose te klikken om de data effectief aan het registratieformulier TOE TE VOEGEN.
Hierna komt u automatisch weer terecht op het registratieformulier, waar de SADMI notificatiecode van het implantaat werd geregistreerd. U kunt nu de bovenstaande procedure herhalen voor bijkomende implantaten door op de knop "Voeg een ander(e) toe".
Bij gebruik van een implantaat zonder notificatiecode selecteert u de Categorie en voert u de nodige beschikbare data in.
Opmerking: SADMI staat voor Source Authentique des dispositifs médicaux implantables. Algemene en technische informatie vindt u in het SADMI cookbook dat beschikbaar is via het eHealth platform.
Vooruitgang
Door het tabblad "Vooruitgang" aan de rechterkant van het scherm te selecteren, wordt de inhoudstafel vervangen door een voortgangsbalk en een lijst met openstaande validatiefouten.
U kunt de lijst met openstaande validatiefouten gebruiken om door het onderzoeksformulier te navigeren: door op een validatiefout in de lijst te klikken, gaat u naar dit onderdeel in het onderzoeksformulier.
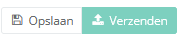
Als het studieformulier is ingevuld, en er zijn geen validatiefouten, kunt u deze registratie Opslaan of Verzenden. Merk op dat de knop Verzenden helder groen is.
Als het studieformulier is ingevuld, maar er zijn nog validatiefouten, kunt u deze registratie Opslaan maar niet Verzenden. Merk op dat de knop Verzenden schemerig groen is.
Als het studieformulier is opgeslagen of verzonden, wisselt het scherm naar de overzichtstabel. Deze tabel is echter niet meer leeg, maar geeft de opgeslagen of verzonden registratie weer.
This documentation is being updated regularly. We try to provide as correct, complete and clear as possible information on these pages. Nevertheless, if you see anything in the documentation that is not correct, does not match your experience or requires further clarification, please create a request (type : request for information) via our portal (https://sciensano.service-now.com/sp) or send us an e-mail via support.healthdata@sciensano.be to report this documentation issue. Please, do not forget to mention the URL or web address of the page with the documentation issue. We will then adjust the documentation as soon as possible. Thank you!