The NSIH SSI data collection
The NSIH SSI data collectionOrganizations and/or individuals that provide data
Not available
Start date of the data collection
Not available
End date of the data collection
Ongoing
Periodicity of the data collection
Continuous
The NSIH_SSI Data Collection Definition (HDBP0033)
The NSIH_SSI Data Collection Definition (HDBP0033)In the file below you can find the Data Collection Definition (DCD) specifications of the project NSIH_SSI. It is a detailed description of the content of one DCD
with field names, formats, values, validation rules, help texts, error messages, translations... These specifications were used to build the forms and csv files for this project, which you also can find in this project manual.
This documentation is being updated regularly. We try to provide as correct, complete and clear as possible information on these pages. Nevertheless, if you see anything in the documentation that is not correct, does not match your experience or requires further clarification, please create a request (type : request for information) via our portal (https://sciensano.service-now.com/sp) or send us an e-mail via support.healthdata@sciensano.be to report this documentation issue. Please, do not forget to mention the URL or web address of the page with the documentation issue. We will then adjust the documentation as soon as possible. Thank you!The NSIH SSI Dataflow Description
The NSIH SSI Dataflow DescriptionBelow we describe (high level) the NSIH SSI dataflow between the data provider and the healthdata.be platform.
Step 1. (Automatic) data export from systems of data provider towards HD4DP v1 and prefill of forms if not complete.
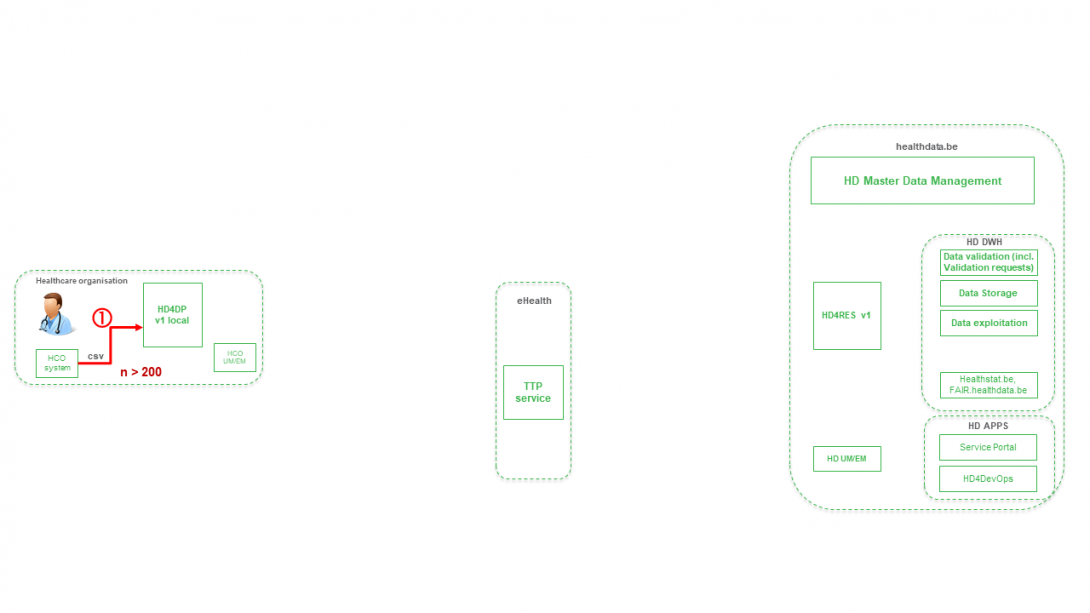
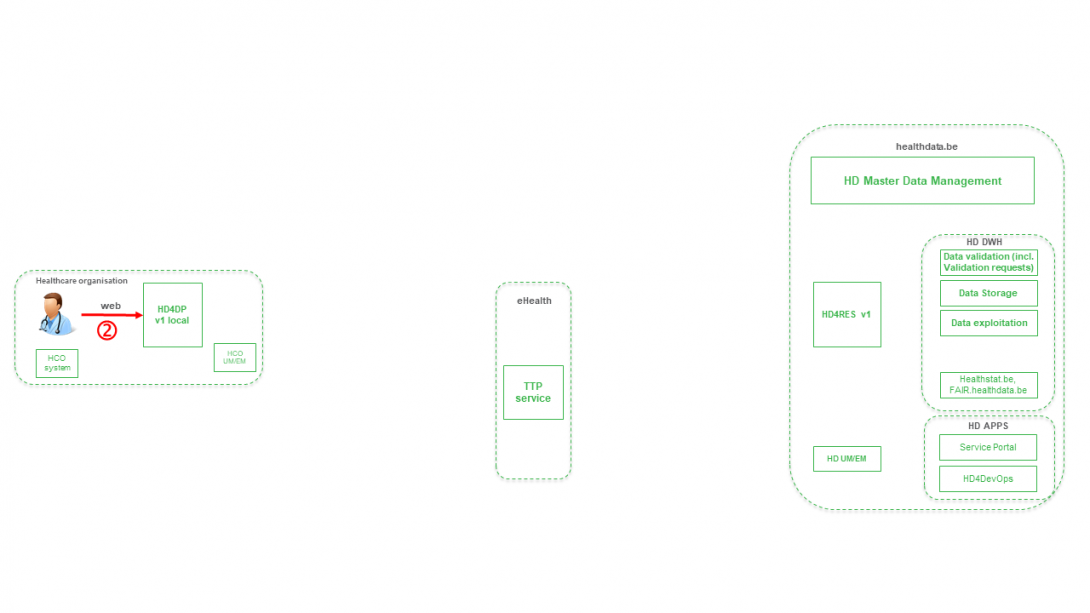
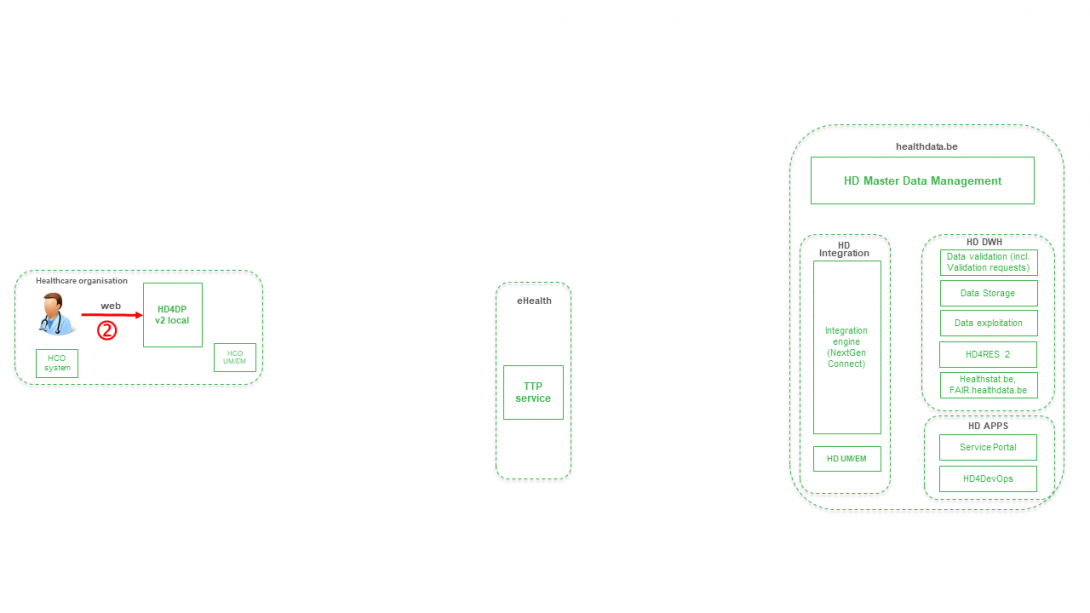
Step 2. Manual registration (de novo or completion) of data in form component of HD4DP v1.
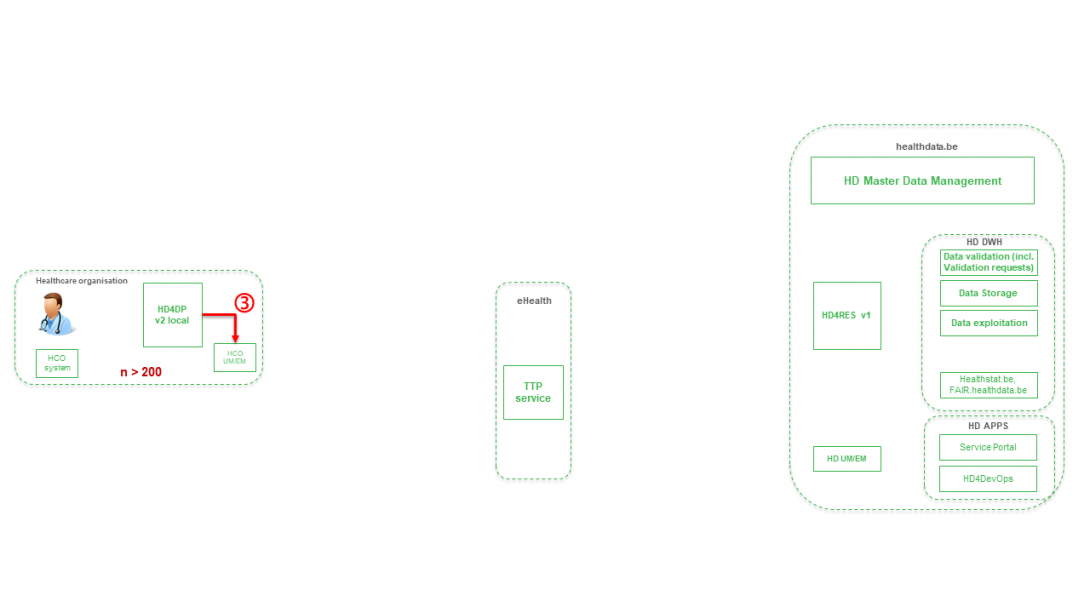
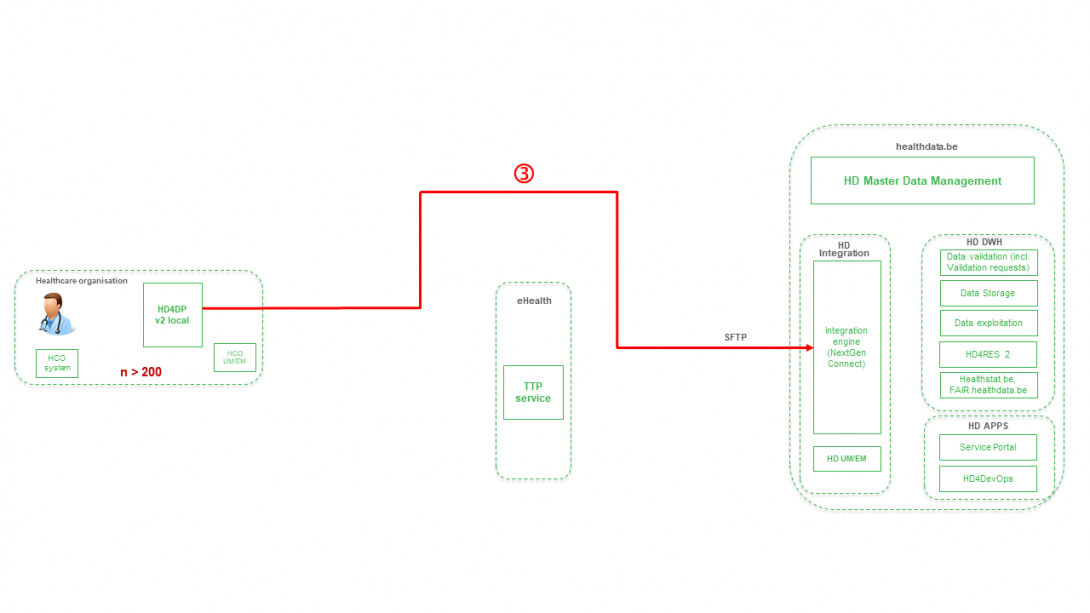
Step 3. Transfer of patient identifiers and registry data from HD4DP v1 towards eHBox messaging client of HCO (HCO UM/EM)
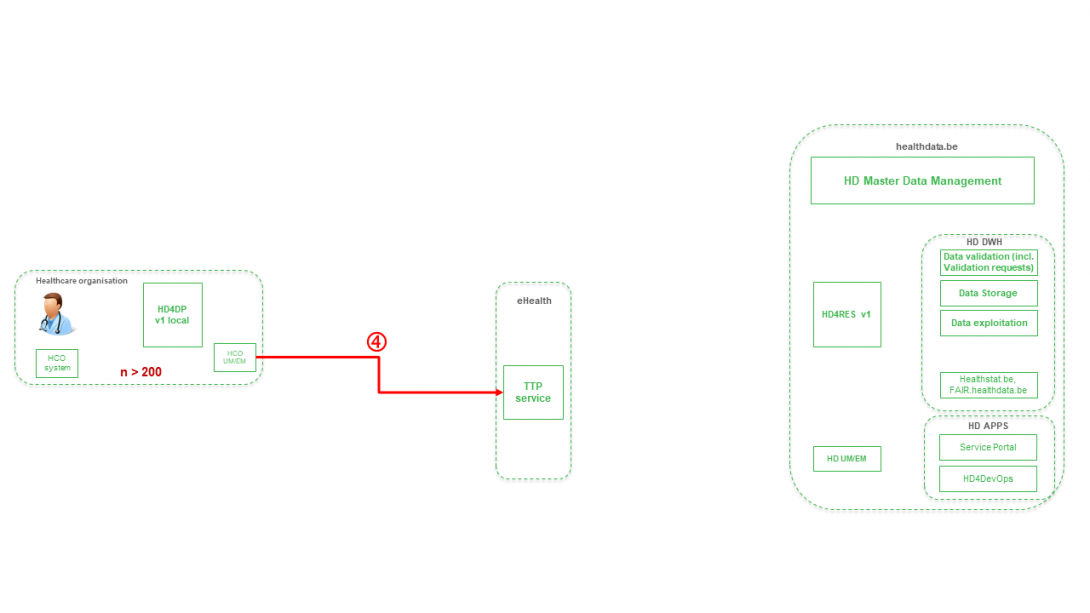
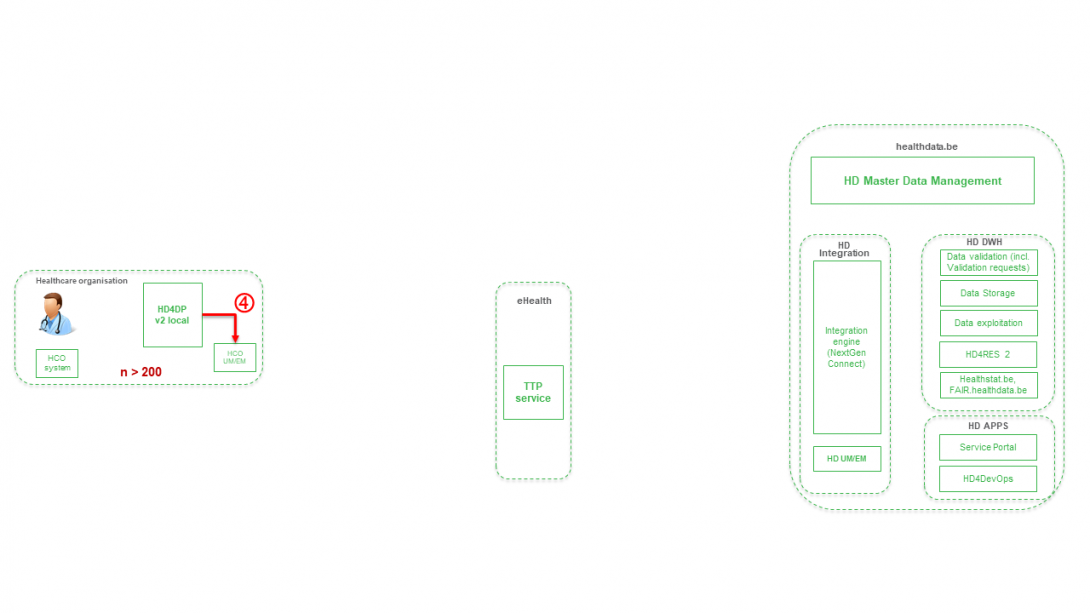
Step 4. Transfer of patient identifiers and registry data from eHBox messaging client of HCO (HCO UM/EM) towards TTP service of eHealth.
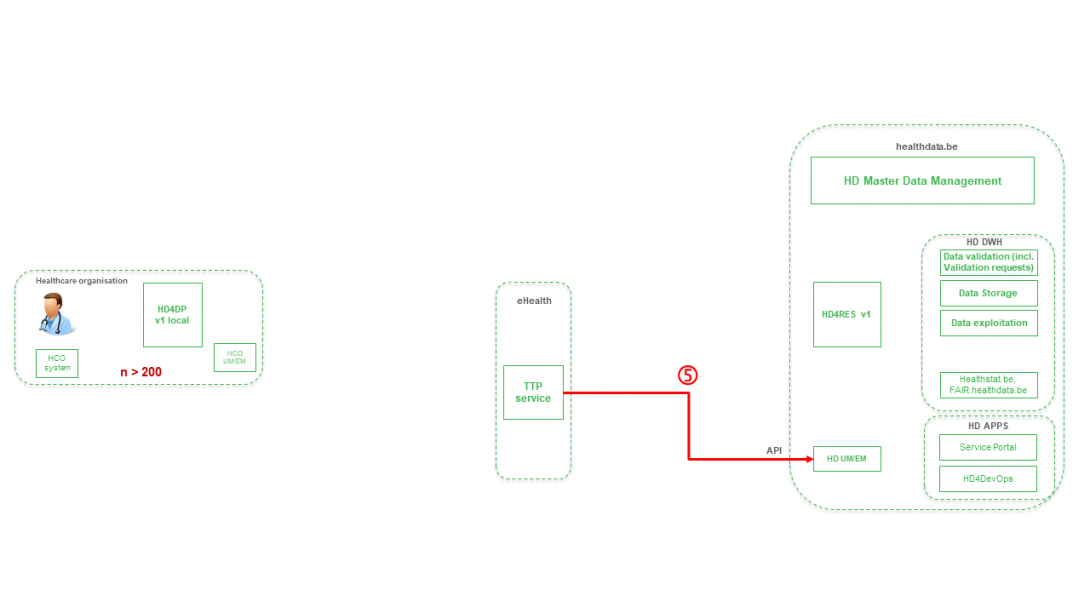
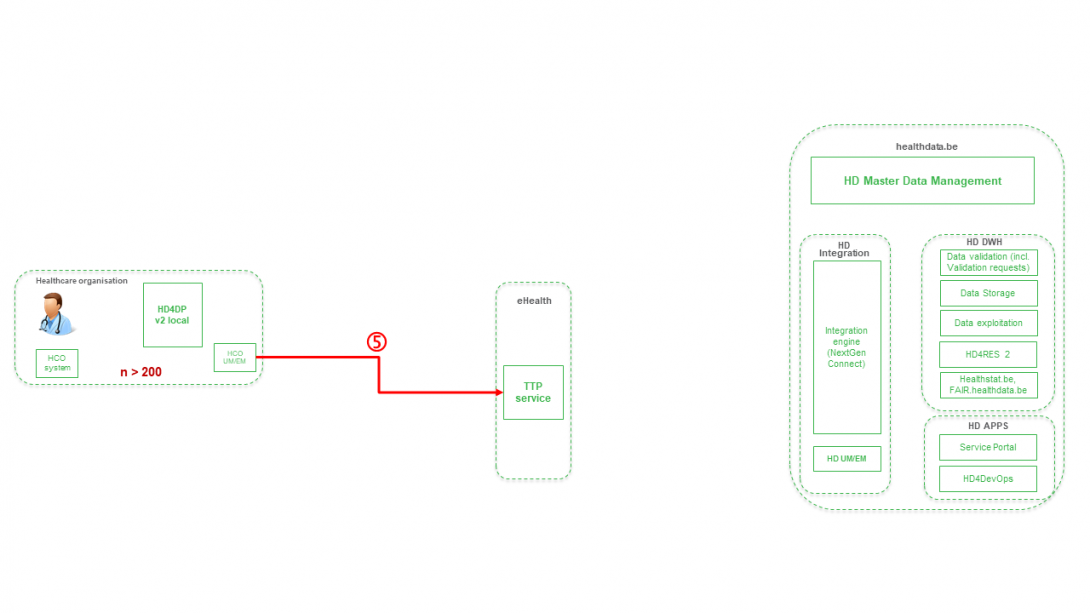
Step 5. Transfer of pseudonymized patient identifiers and registry data from TTP service of eHealth towards eHBox messaging client of HD (HD UM/EM)
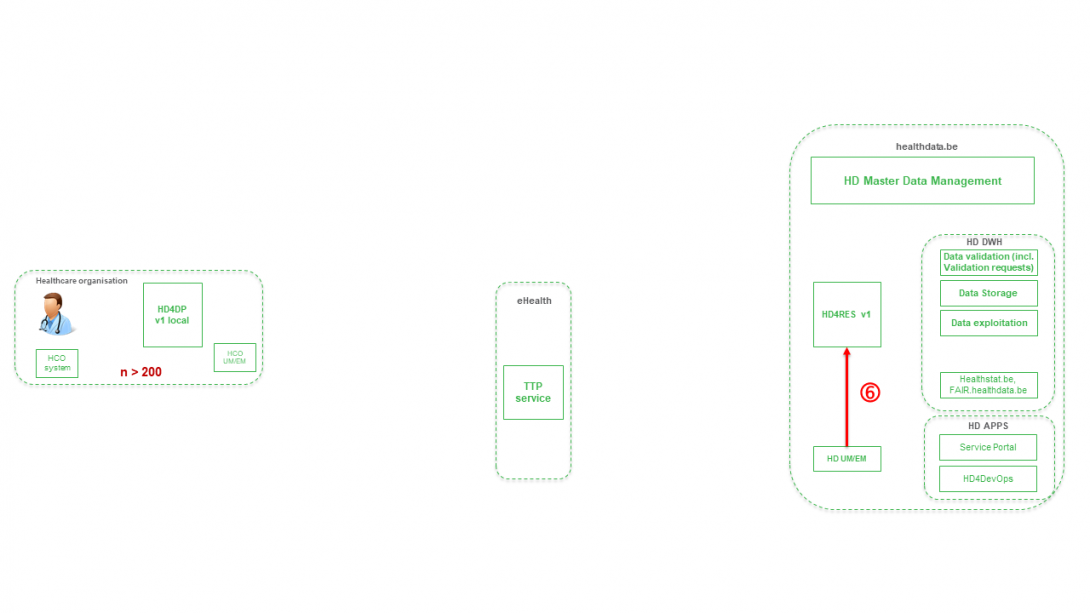
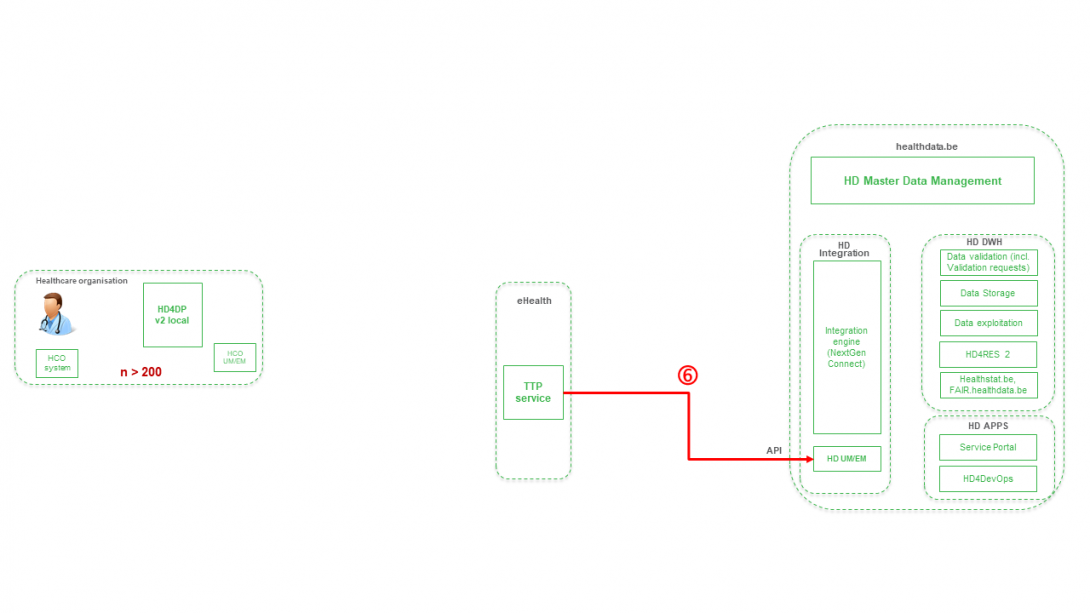
Step 6. Transfer of pseudonymized patient identifiers and registry data from eHBox messaging client of HD (HD UM/EM) to HDRES v1
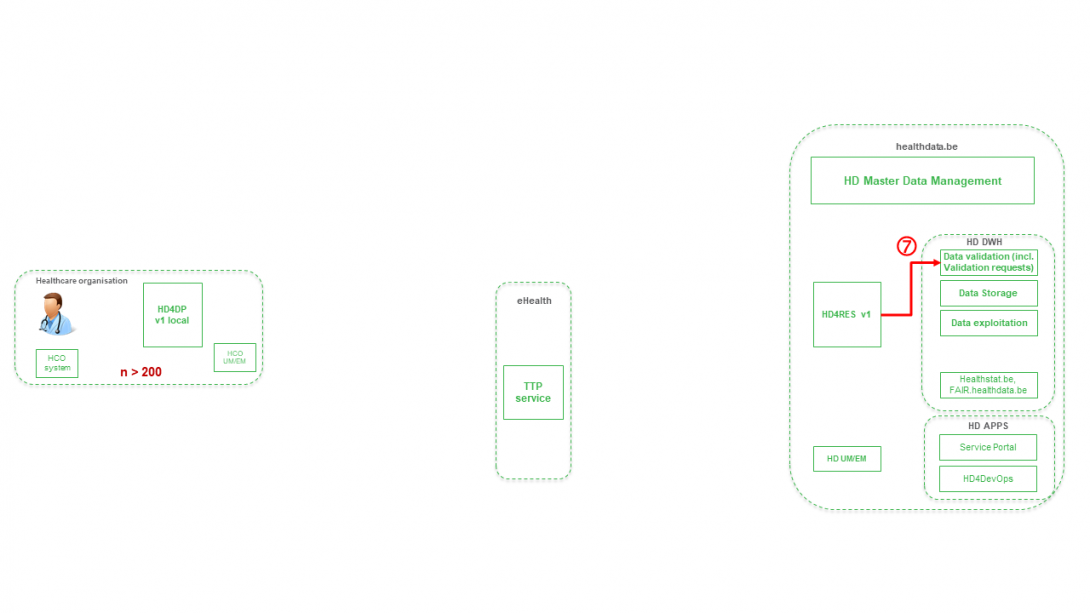
Step 7. Transfer of pseudonymized patient IDs and registry variables from HD4RES v1 towards Data Validation environment on HD DHW.
Future NSIH SSI Dataflow Description
Future NSIH SSI Dataflow DescriptionStep 1. Automatic data export from systems of data provider towards HD4DP v2 and prefill of forms if not complete.
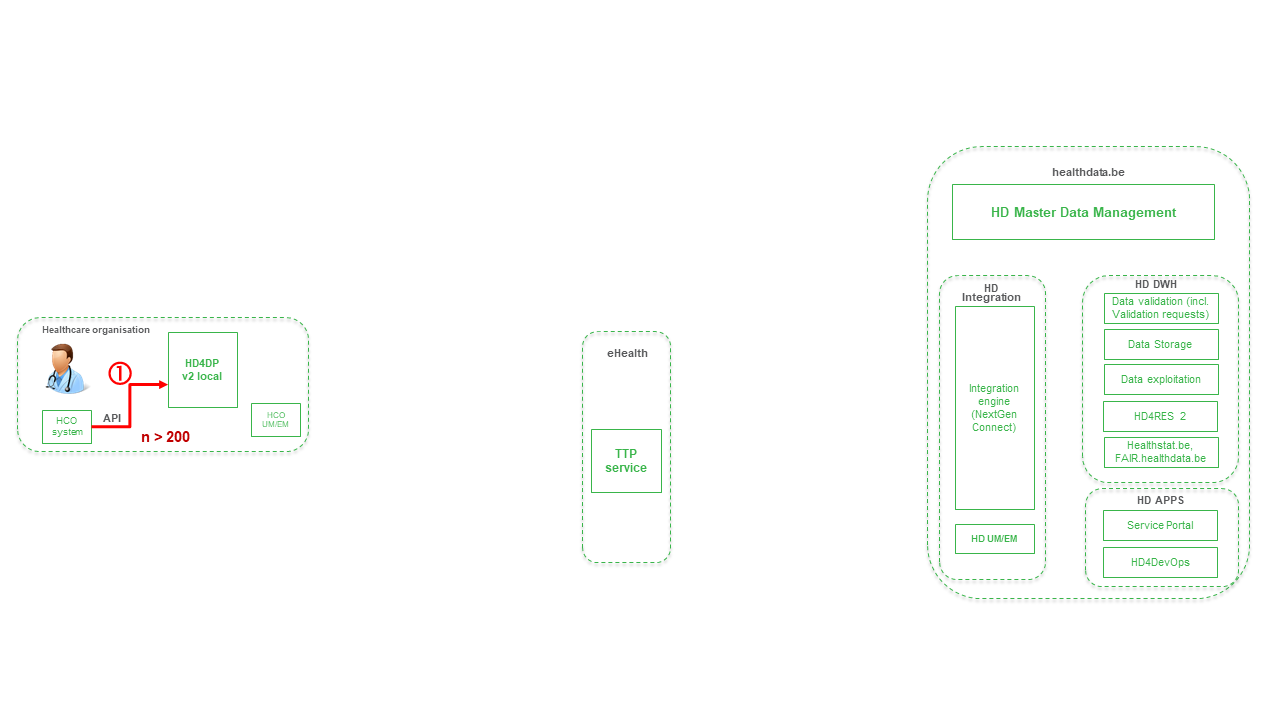
Step 2. Manual registration (de novo or completion) of data in form component of HD4DP v2.
Step 3. Direct real time transfer of registry variables and technical ID of record from HD4DP v2 towards HD.
Step 4. Transfer of patient identifiers and technical ID of record from HD4DP v2 towards eHBox messaging client of HCO (HCO UM/EM).
Step 5. Transfer of patient identifiers and technical ID of record from eHBox messaging client of HCO (HCO UM/EM) towards TTP service of eHealth.
Step 6. Transfer of pseudonymized patient identifiers and technical ID of record from TTP service of eHealth towards eHBox messaging client of HD (HD UM/EM).
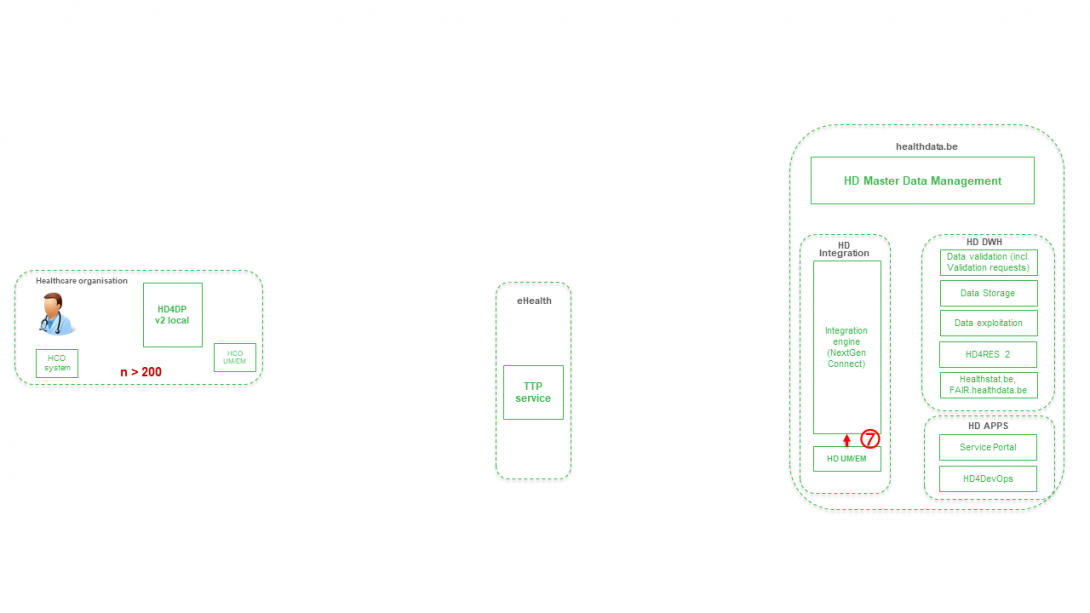
Step 7. Transfer of pseudonymized patient identifiers and technical ID of record from eHBox messaging client of HD (HD UM/EM) to HD Integration engine.
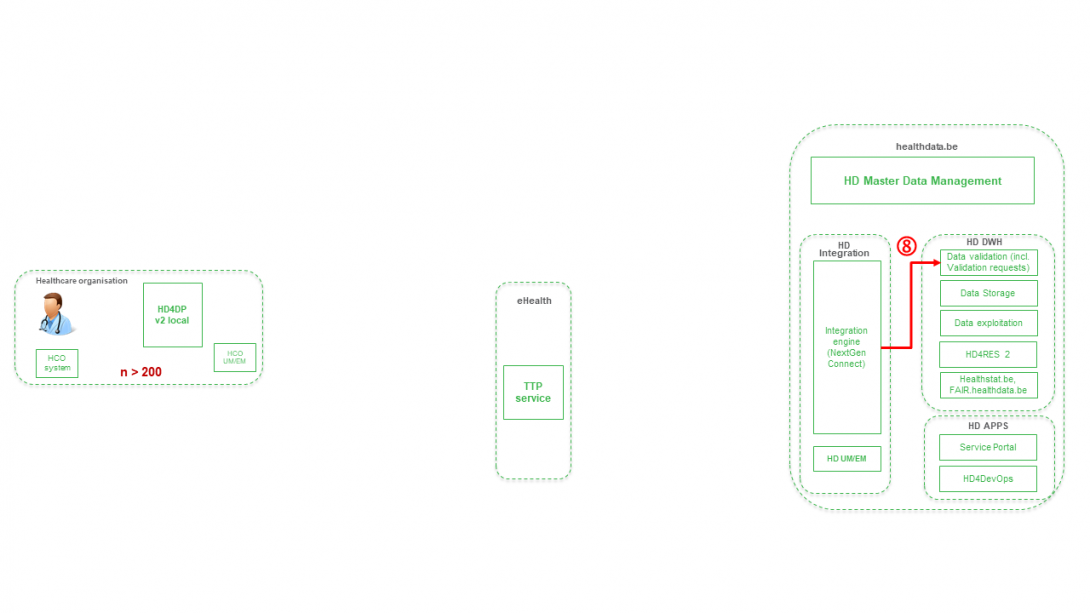
Step 8. Joining of pseudonymized patient IDs and the registry variables based on the technical ID and Transfer of the records from HD Integration engine towards Data Validation environment on DHW.
HD4DP v1
HD4DP v1Please be advised that HD4DP v1 will be replaced by HD4DP v2 in the near future.
The exact date of when the project will be available in HD4DP v2 will be communicated well in advance.
General description of the application HD4DP v1
General description of the application HD4DP v1HD4DP v1 ("healthdata.be for data providers") is a local application accessible via web browser developed by healthdata.be (Sciensano) and installed at the site of the data provider (healthcare organizations). This application allows the data provider to extract data from the primary system and map that data into one or more data collections (if possible).
Clinical information that cannot be provided by the primary systems can be provided manually in the ‘prefilled’ form view of the Data Collection Definition (DCD).
The (form view of the) Data Collection Definitions (DCDs) are managed centrally via a metadata catalogue.
User manual of the application HD4DP v1
User manual of the application HD4DP v1An extensive user manual, for both participating healthcare organizations and their IT service providers, is available on this docs.healthdata.be portal: https://docs.healthdata.be/hd4dp-v1.
Request account for HD4DP v1
Request account for HD4DP v1To access the HD4DP v1 application, you need an account, a username and a password. If you do not have an account, you can request one by following the steps below. If you have an account, follow the "sign in" instructions at the end of this page.
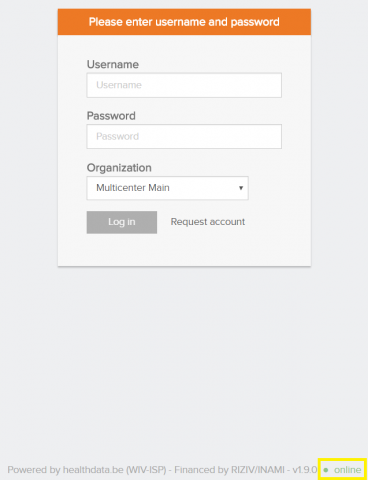
- Open the link for the HD4DP v1 application. You will see this screen:
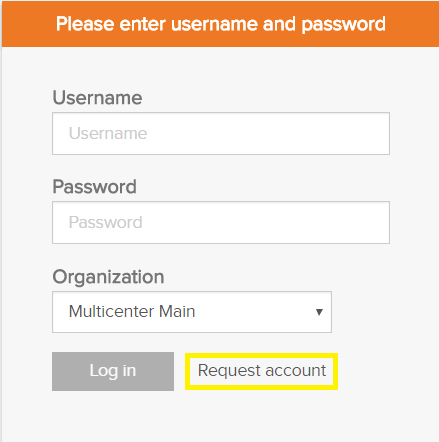
- Click on the Request account link on the login page.
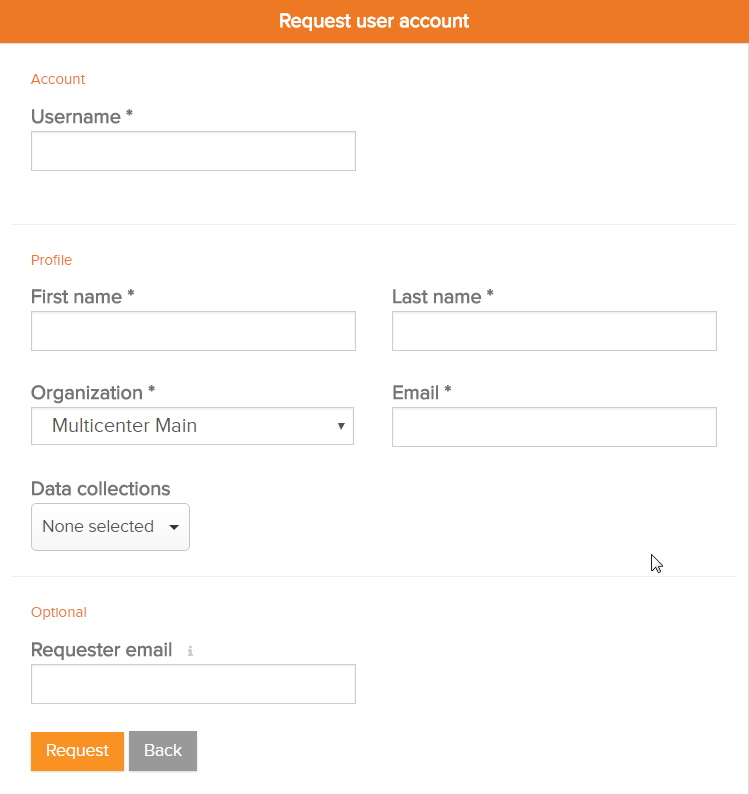
- Fill out the request form:
- Enter a username, first name, last name and e-mail address
- Select the organization and data collection(s)
- Fill in the Requester e-mail field if a person requests an account for a third person
- Submit the request user the Request button
- Confirmation e-mails are sent to the person for whom the account was requested as well as the requester, if the field "Requester e-mail" was filled.
- The approval or rejection for the user account is confirmed by mail. Depending on your organization, this could take a few hours.
- This action will be done by an HD4DP v1 administrator in your organization
- The confirmation mail will include all the necessary information to log in
Sign in
Logging in to the HD4DP v1 application is done in 3 steps:
- Enter your username and password in the appropriate fields
- Select the correct organization
- Click on "Log in"
Create a registration in HD4DP v1
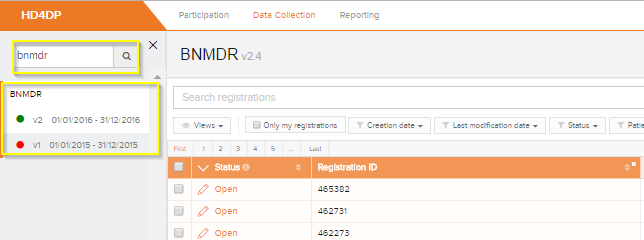
Create a registration in HD4DP v1The Data Collection view leads a user to the existing registers. A user can start collecting data from this view.
Creating and submitting a registration consists of 4 steps:
- Select the register for creating a registration.

- Click on "New registration" button.
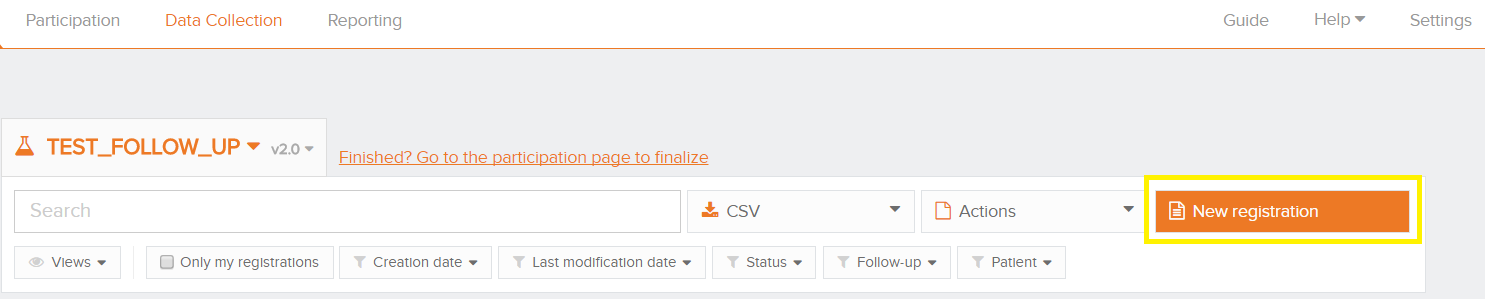
- Fill in the registration form and save or submit the registration

- Save the registration temporarily if needed. The status of the record will be "Open" for saved registrations.

- Submit the registration if no validation errors present. The status of the registration will change to "Sending".
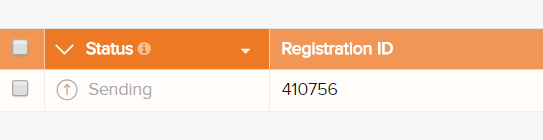
- When the record has been processed, the status will change to "Submitted".

As soon as a registration is sent, the "status confirmation" column will show "Pending".
- It shows "OK" once the registration has arrived, and "NOK" if the registration did not arrive within 48 hours. If the status is "NOK", the software will automatically try to resend the registration up to 10 days after the initial submission.
- For the statuses "Sending","Corrections needed" and "Approved" the status confirmation will be empty because the registration has not yet been submitted.
- A registration can be "Reopened" if needed as long as the status of the registration is "Submitted".
Change a registration in HD4DP v1
Change a registration in HD4DP v1A user can modify and complete a registration in four steps:
- Select the register from which you wish to modify one or more registration(s).

- Click on the registration to be changed, and complete the form in full. The status of the record is then:
- Open for registrations saved manually or by uploading a csv file
- Corrections needed for registrations with errors

- Save registration temporarily if necessary. Record status becomes Open for stored registrations.

- Send the registration if there are no more validation errors.
- Registration status changes to Sending

- When the record is processed, the status changes to Submitted.

Once a registration is sent, the message Pending appears in the status confirmation column.
- When the registration is received, the message OK appears; if the registration is not received within 48 hours, the message NOK appears. With the status "NOK", the software will automatically try to send the registration up to 10 days after the initial submission.
- For the statuses Sending, Corrections needed and Approved, the status confirmation is empty because the registration has not yet been sent.
- A registration can be Reopened if necessary, as long as the status of the registration is "Submitted".
Delete a registration in HD4DP v1
Delete a registration in HD4DP v1Only registrations with status Open or Corrections needed can be deleted.
The following steps are required to delete the registration:
- Select the record and version for which you wish to delete a registration
- Select the registration(s) you wish to delete
- Select the Actions button and select the Delete registrations option
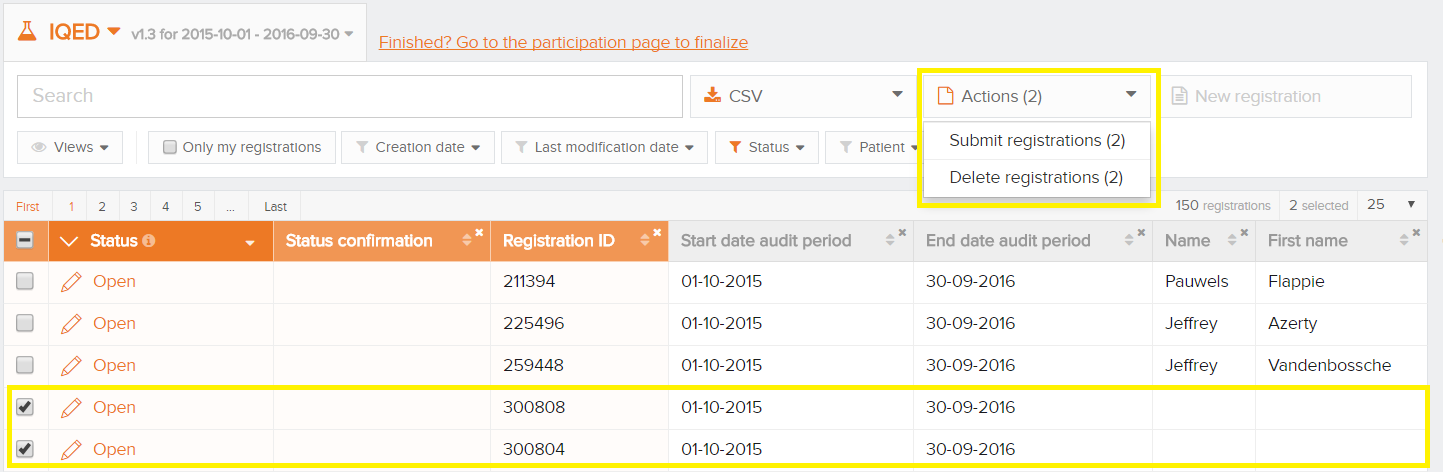
- Select Yes to confirm

Technical manual of the application HD4DP v1
Technical manual of the application HD4DP v1 Bart.Servaes Thu, 07/20/2023 - 12:52HD4DP v1 csv upload
HD4DP v1 csv uploadThe upload center is introduced to make the upload of multiple registrations more performant and user friendly.
The link to the upload center can be reached by the main menu:
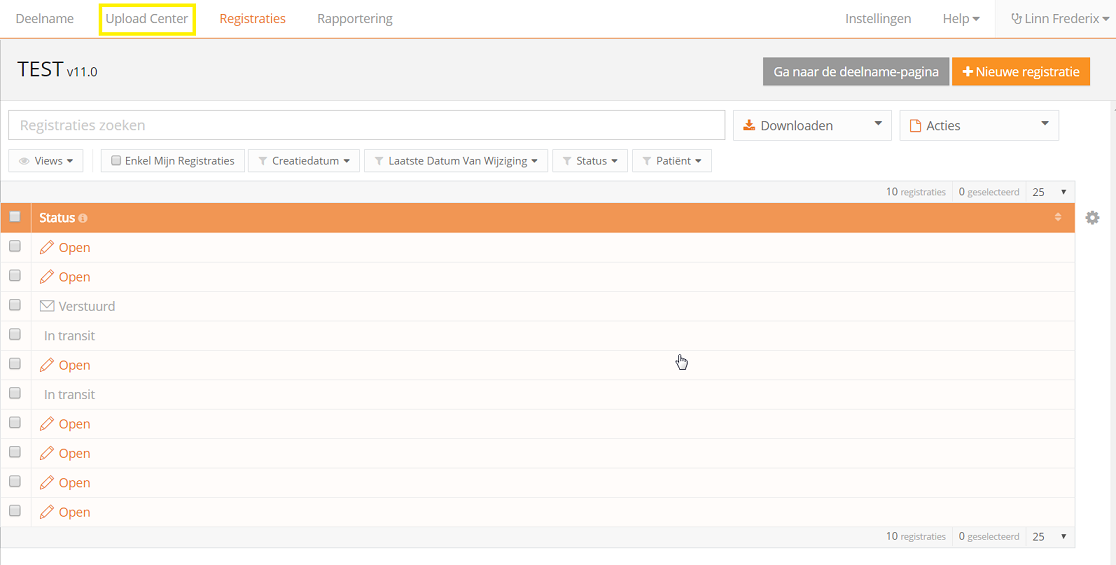
If uploads are processed, an overview with the name of the uploade file, the status and a visual representation of the status, the number of records that were processed, the way of uploading, the user and the upload date is saved in the main screen of the upload center is given to the user a quick and visual impression of the data uploaded in bulk by using the upload center:
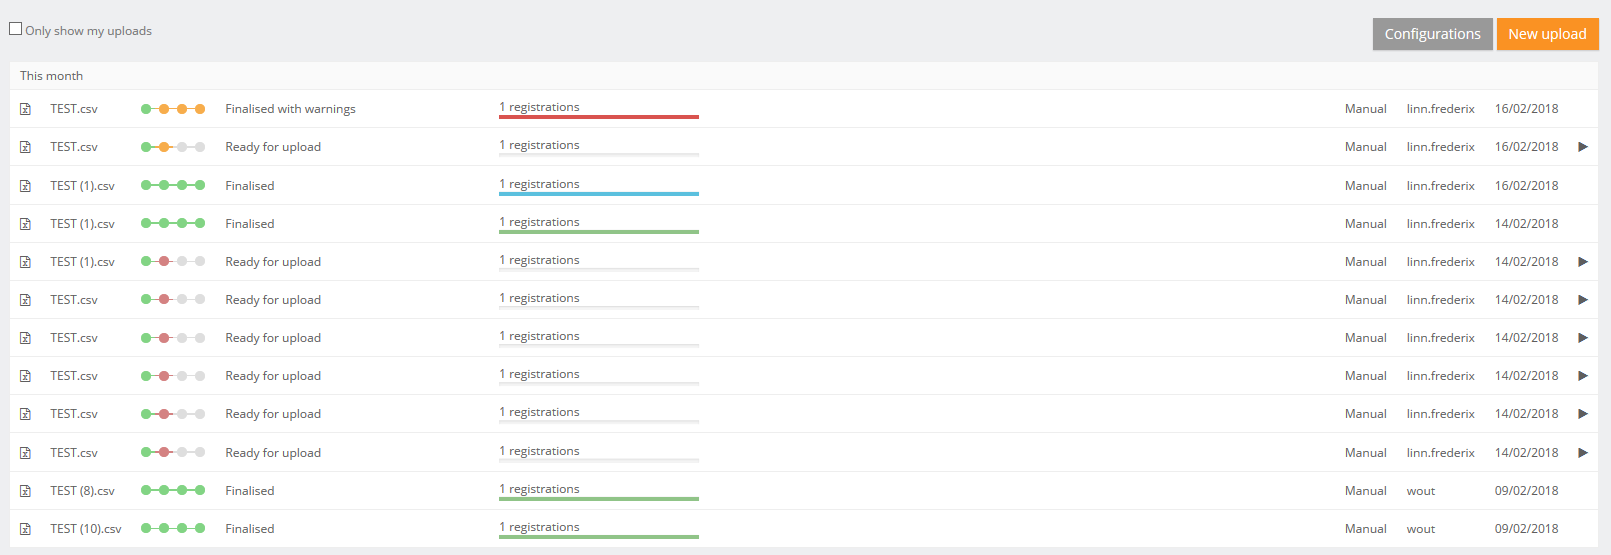
In the right upper corner two buttons are shown.
- Configuration: the default settings for a register can be set by any user that is authorized to participate in a register.

Following options are available:
- Conflict mode: what need to be done in case of conflict
- Conflict master: is the data from the new registration of from the record in the database saved in case of conflict
- Ignore duplicate records
- Autosubmit: send the data automatically for processing in HD4RES
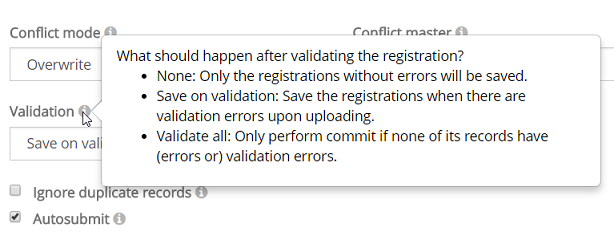
- Validation: what need to be done after validation the registration:
- None: only the registrations without errors will be saved
- Save on validations: Save the registrations when there are validation errors upon uploading
- Validate all: Only perform commit if non of its records have (errors or) validation errors
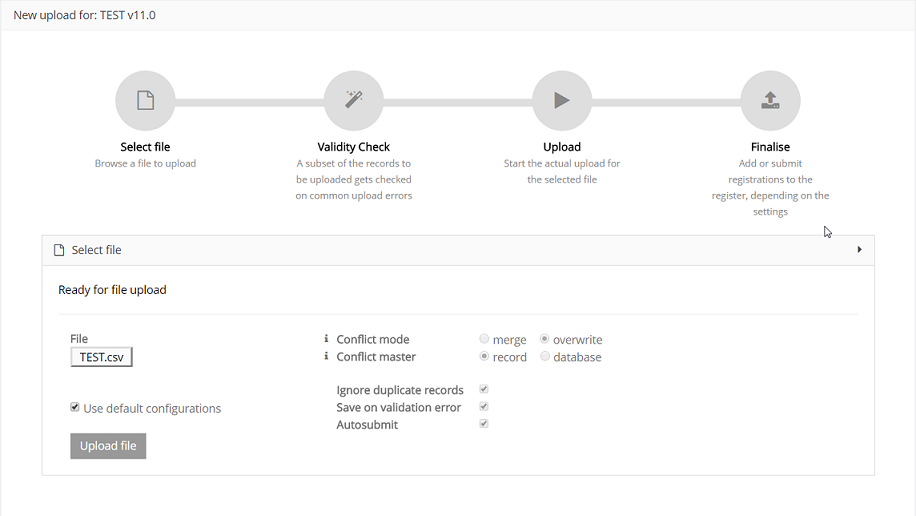
4 steps need to be executed for a new upload. When the titel bar of a separate step turns green, orange or red and the icon of the step in the overview, the step has respectively ended with success, with warnings or errors.
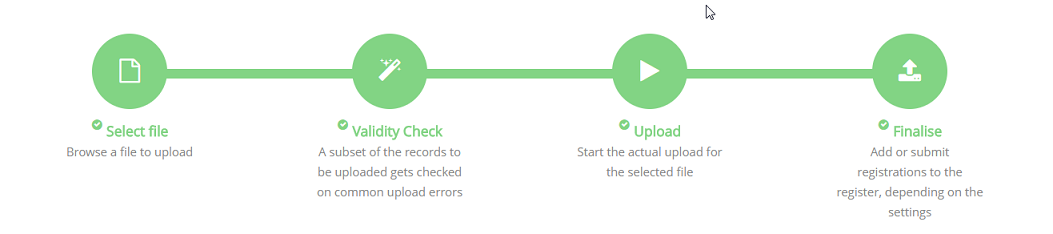
Step 1 - Select file
The first step is to select the CSV file with the data to be uploaded. The default settings for a register can be found in the Configurations on the main screen of the upload center.
Be sure to deselect the "Use default configurations" when changing the default settings:
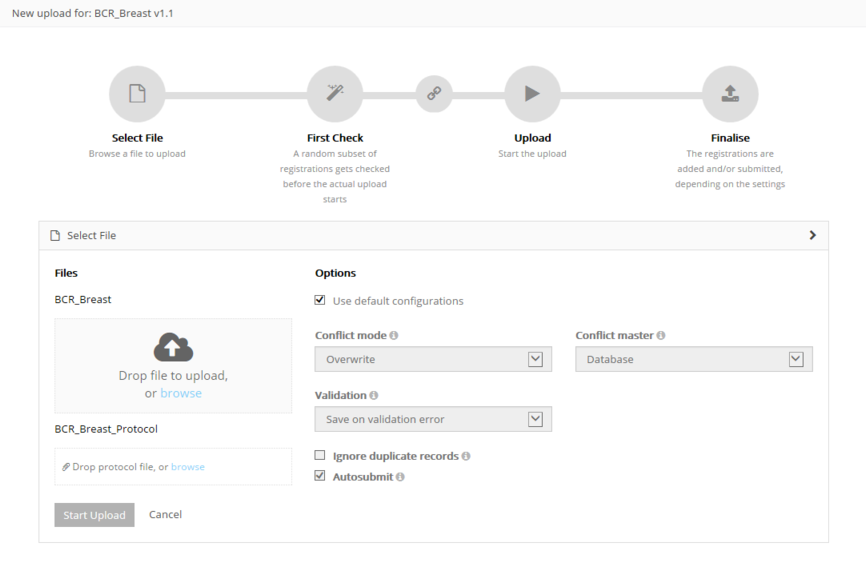
For the BCR register, the possibility exists to upload two files and link them during the process:
- Both documents will be validated separately. By using the link "Click here to see the linked upload" the user can switch between the linked documents. Refresh of push F5 on you to see the status of the upload.
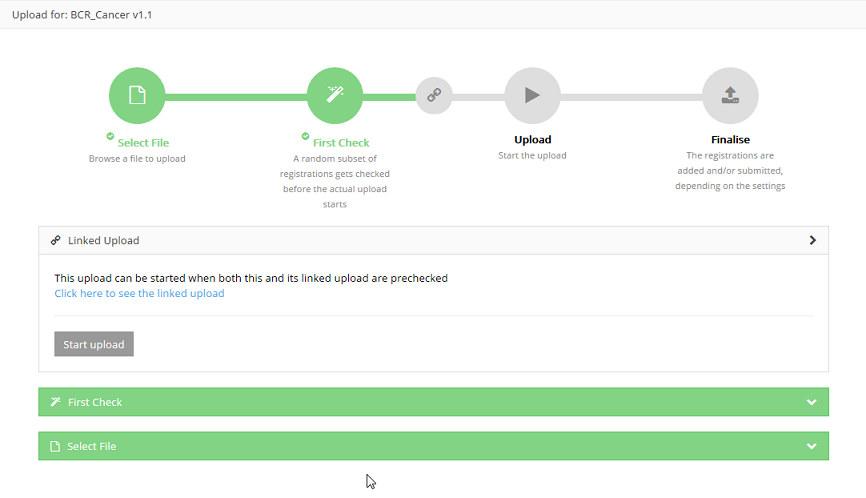
After uploading succesfully, the title bar of this step will turn green.
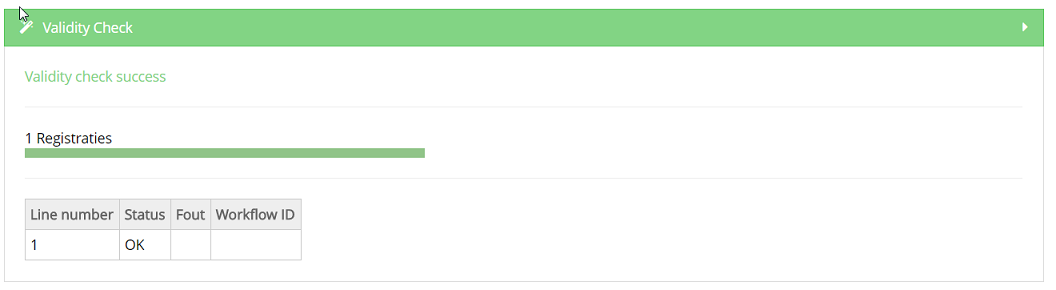
Step 2 - Validity Check
Validation checks are executed for every record.
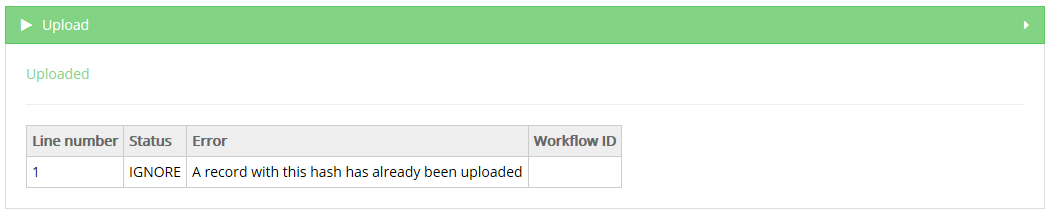
Step 3 - Upload
The file is being uploaded and the result is shown in this step per line of data added:
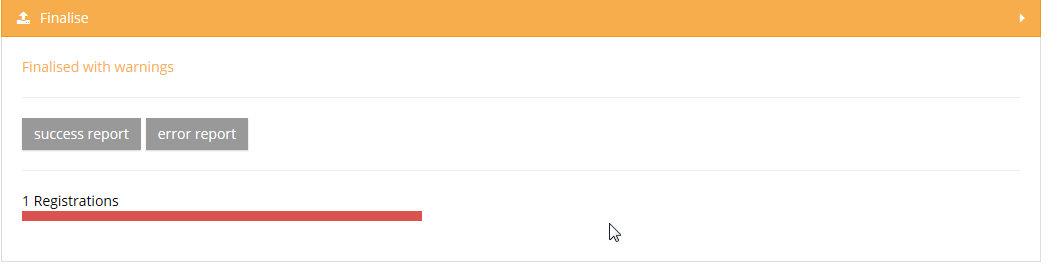
Step 4 - Finalize
The result is shown visually for all registrations and for all registrations in a CSV file in reports after finalization:
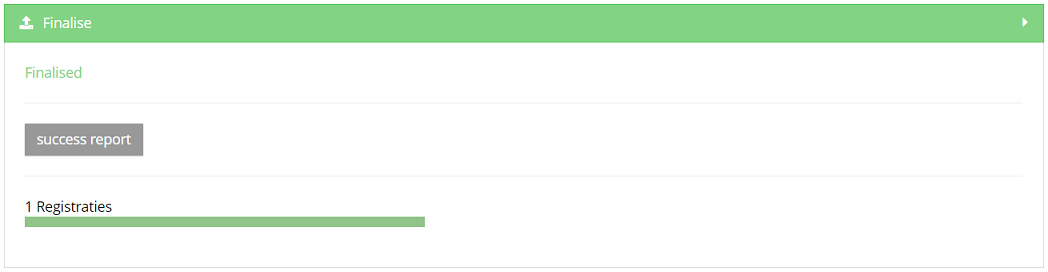
Succes report is a CSV file with all registrations who were processed succesfully.
In case of errors, a link to a detailed error report is shown too:
Please find below the movie that guides you through the functionalities of the Upload Center:
Créer un CSV pour HD4DP v1
Créer un CSV pour HD4DP v1Le contenu de cette page n'est disponible qu'en anglais. Sélectionnez le bouton de la langue EN pour le lire.
CSV download and upload for stable data
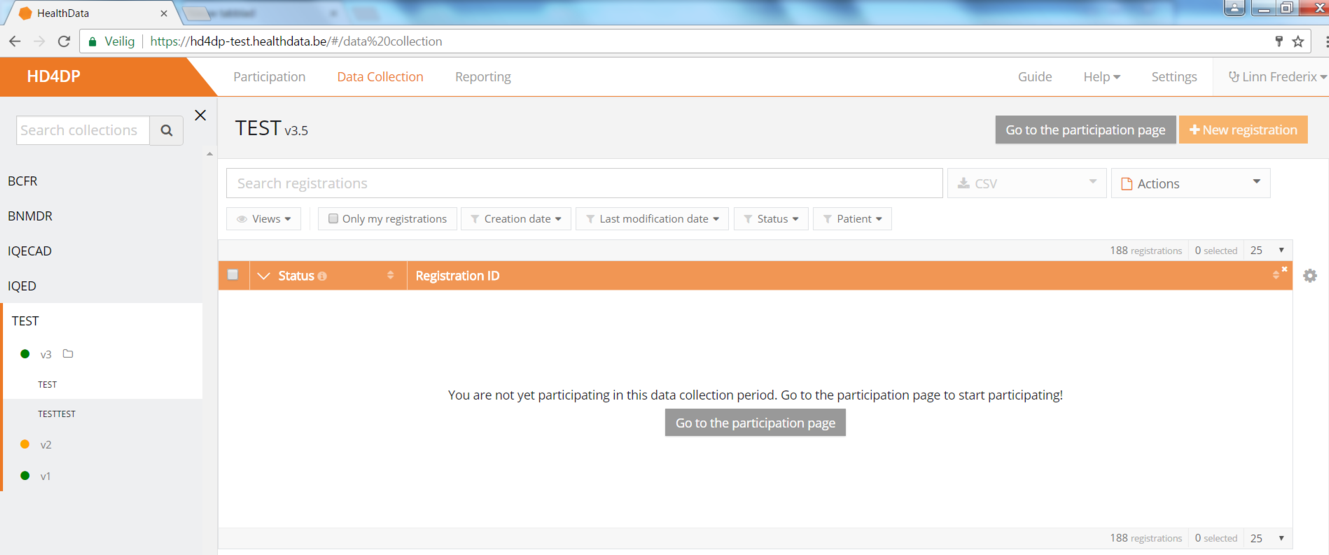
CSV download and upload for stable dataBefore starting a new data collection based on stable data of another data collection, you need to finalize the data collection which serves as the starting point of your new data collection cf. article "Finalize the data collection"
To start the new data collection select the new version in the Data collection section. In this case v3.
Click the button "Go to the participation page":
- Click on ‘Participate’:
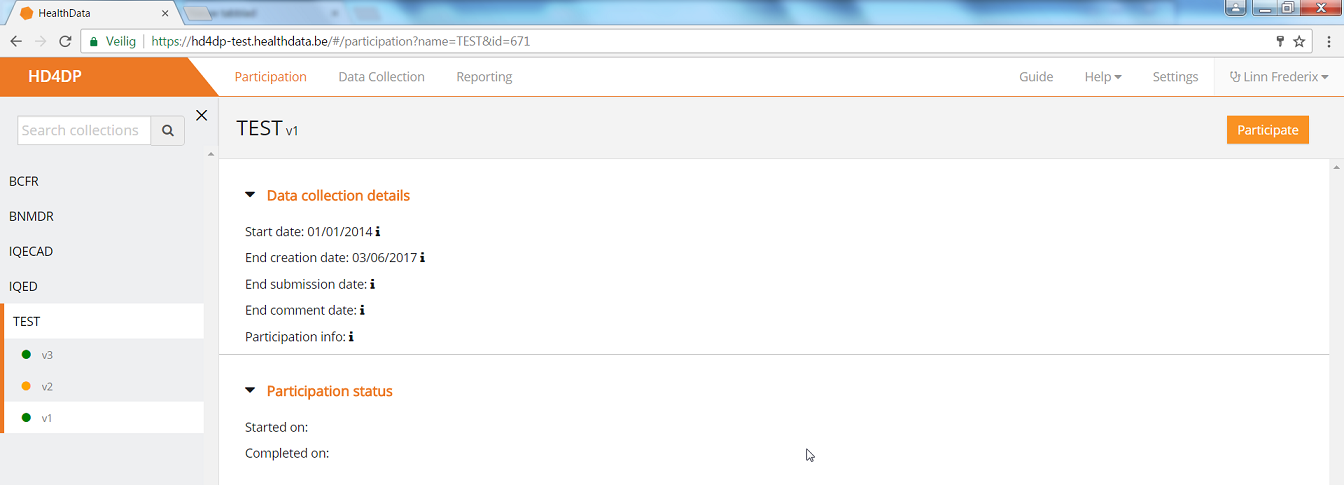
- The Start date in the Participation status will be updated and access to the new version is completed and the user can return to the Data Collection section:
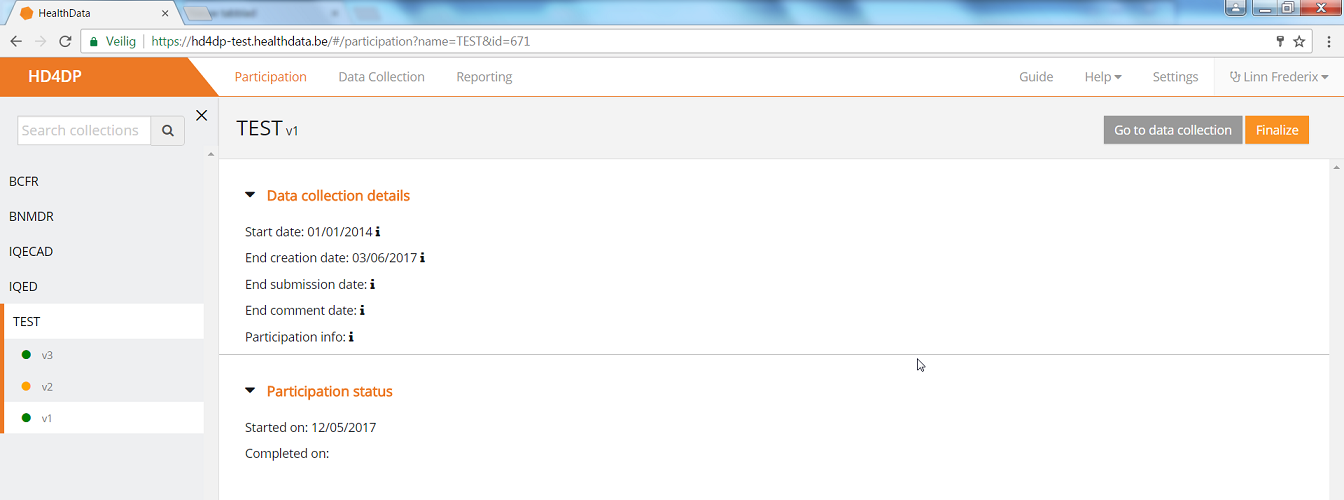
- Once the previous data collection is finalized and the new one has been started, you can download data from the first version and add those to the next version.
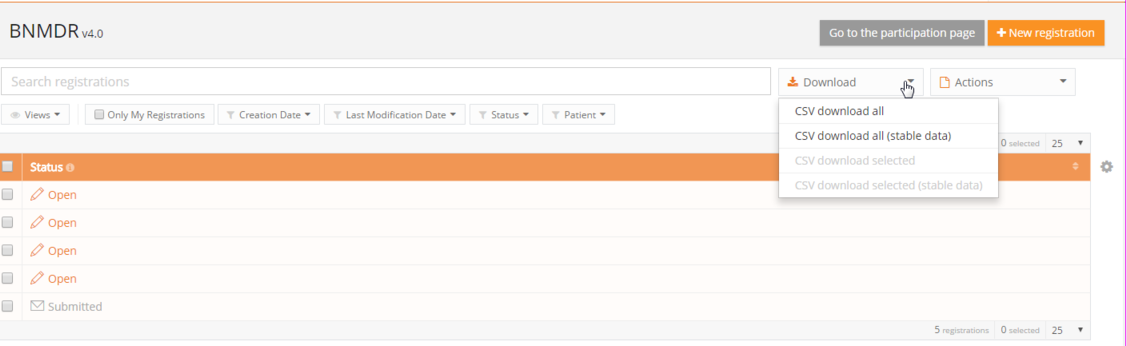
- Go to the Registrations tab:
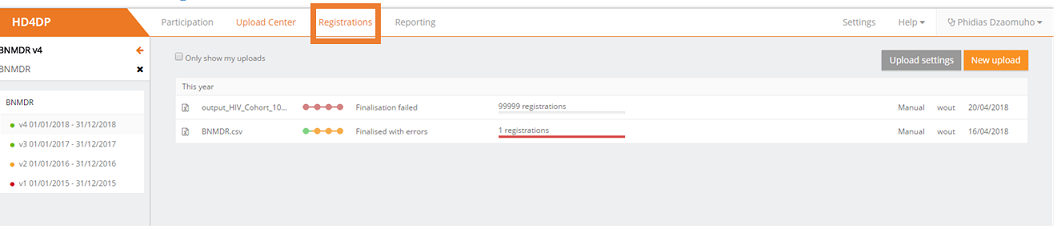
- Download the data by using the Download button "CSV Download All (Stable Data)":
When everything is downloaded, you can start uploading by Using the upload center.